
Compaq ProLiant DL320 Ultra-Dense Server Deployment in Compaq Racks

Compaq ProLiant DL320 Ultra-Dense Server Deployment in Compaq Racks 33
13AS-0900A-WWEN
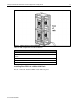
Fixed Rail Rack Solution
Viewing the rear of the rack, insert the tabs on the right edge of the fixed cable tray into the slots
on the fixed rail. Tighten the rail thumbscrew that secures the fixed cable tray to the rail.
For detailed installation instructions for the fixed rail rack kit that ships with the server, refer to
Compaq ProLiant DL320 Setup and Installation Guide.
Sliding Rails and Cable Management Solution
After installing the sliding rack rails, install the cable tension reel and the cable rack bracket.
Install one tension reel and one rack bracket for each piece of equipment installed in the rack.
Cable Tension Reel
Viewing the rear of the rack, install the cable tension reel on the right vertical rack support. Align
the right side of the cable tension reel along the outside of the rack so that it is even with the
installed sliding rack rail. Hook the pin on the back of the cable tension reel into the square hole
on the sliding rack rail. Tighten the thumbscrew to attach the cable tension reel to the sliding rack
rail.
The Cable Rack Bracket
Install the cable rack bracket on the left side of the rack. Align the left side of the cable rack
bracket along the outside of the vertical rack support so that it is even with the sliding rack rail.
Tighten the thumbscrew to attach the cable rack bracket to the sliding rack rail.
For detailed installation instructions for the sliding rail and cable management solution option,
refer to Sliding Rails and Cable Management Solution Guide for ProLiant DL320 Servers.
CAUTION: Always install from the bottom of the rack to the top. Installing servers in
this manner provides more stability for the rack and reduces the risk of the rack tipping
over.