
ProLiant DL320 Generation 3 Server User Guide
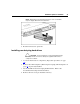
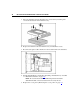
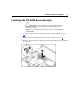
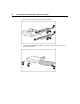
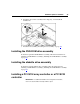
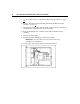

Table Of Contents
- HP ProLiant DL320 Generation 3 Server User Guide
- Notice
- Contents
- Server component identification
- Server operations
- Powering up the server
- Powering down the server
- Preparation procedures
- Extending the server from the rack
- Removing the access panel
- Installing the access panel
- Removing the PCI riser board assembly
- Installing PCI riser board assembly
- Removing the hot-plug SATA backplane
- Removing the fan assembly
- Installing the fan assembly
- Server setup
- Hardware options installation
- Server cabling
- Server software and configuration utilities
- Battery replacement
- Troubleshooting
- Electrostatic discharge
- Regulatory compliance notices
- Regulatory compliance identification numbers
- Federal Communications Commission notice
- Declaration of conformity for products marked with the FCC logo, United States only
- Modifications
- Cables
- Mouse compliance statement
- Canadian notice (Avis Canadien)
- European Union regulatory notice
- Japanese notice
- BSMI notice
- Korean notice A&B
- Laser compliance
- Battery replacement notice
- Taiwan battery recycling notice
- Power cord statement for Japan
- Server specifications
- Technical support
- Acronyms and abbreviations
- Index
Hardware options installation 41
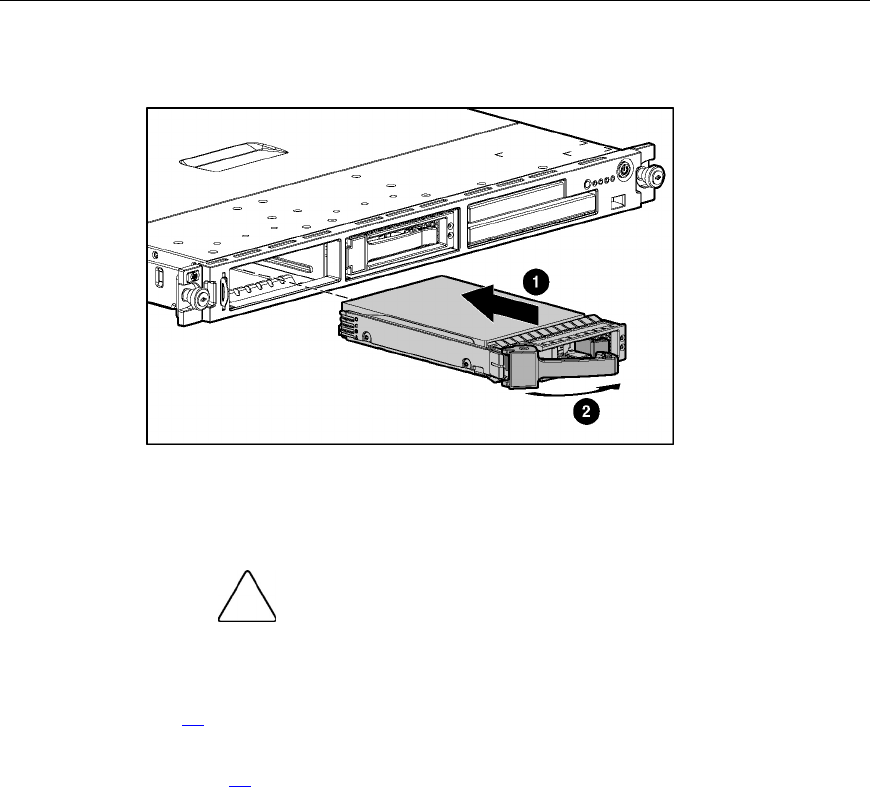
NOTE: Depending on the model purchased, the server or hard drive
may look slightly different than the illustration.
4. Resume normal server operations.
Installing non-hot-plug hard drives
CAUTION: To prevent improper cooling and thermal damage,
do not operate the server unless all bays are populated with either a
component or a blank.
1. Access the internal server components ("Preparation procedures" on page
20
).
2. Remove the SATA backplane ("Removing the hot-plug SATA backplane" on
page 24
), if previously installed.
3. Set the SCSI ID for the non-hot-plug SCSI hard drive. Refer to the
documentation that ships with the hard drive.
4. Remove the four screws pre-installed on the tray.