
HP ProLiant DL160 Generation 5 Server Software Configuration Guide

System BIOS configuration 40
11.
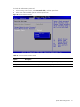
On the next screen, select Format the partition using the NTFS file system, then press Enter.
12. The installer formats and copies files to the hard drive, after which the system reboots and
launches the Windows NOS graphic interface. Be sure to remove the Windows NOS CD-ROM
before rebooting.
13. You can now customize your installation using the graphical interface.
NOTE: The network settings may need to be customized to your environment. Refer to the Windows
NOS manual should you need further details on the networking settings.
14. After completing the customization phase, click Next to proceed with the installation.
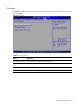
15. The installation status is indicated by the Install Network progress bar. This may take some time.
After the installation is completed, the system automatically reboots.
16. At the Welcome to Windows dialog box, press Ctrl-Alt-Del, then log on as Administrator.
17. If you have successfully installed the Windows NOS, the Configure Your Server wizard
launches. Close this window to postpone the customization of the server until all of the
installation steps are completed.
18. You can open the Configure Your Server wizard at any point by clicking Start | Programs
|Administrative Tools | Configure Your Server.
Section 3. Completing the installation
Phase 1 - Installing the chipset driver
1. Insert the Support CD in the server’s optical media drive.
By default, the Support CD automatically runs and displays the Welcome page. However, if this
does not occur, double-click the Startup.htm file located on the root directory of the Support CD.
2. Click the HP ProLiant DL160 Generation 5 server drivers for chipset, Network, and Video link.
3. Select the ServerEngines chipset driver option for Windows [NOS version] option.
The File Download dialog box displays.
4. Click Open to download the driver.
The Security Warning dialog box displays.
5. Click Yes.
The installation menu for the selected driver is displayed.
6. Follow the on-screen instructions to install the ServerEngines chipset driver.
7. After completing the installation, reboot the server.
Phase 2 - Installing the HP network driver
During the Windows NOS installation, the OS may not detect the embedded HP network interface
card. The following procedure helps you install the LAN driver using the Support CD.
1. Insert the Support CD in the server’s optical media drive. By default, the Support CD
automatically runs and displays the Welcome page. Close this window.
2. Click Start | Settings | Control Panel | System | Hardware | Device Manager.
3. Open the Other Devices tree, labeled with a yellow question mark (?), and double-click on the
appropriate Ethernet Controller option to display its menu.