
HP ProLiant DL140 Generation 3 Server Maintenance and Service Guide


Contents 56
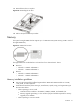
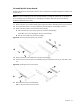
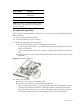
To reinstall the PCI riser board assembly:
1. Align the assembly with the system board expansion slots, and then press it down to ensure full
connection to the system board.
2. Tighten the two captive thumbscrews to secure the assembly to the chassis.
Figure 45 Reinstalling the PCI riser board assembly
3. Perform the post-installation procedure.
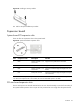
Installing a PCI expansion board
Guidelines for installing PCI expansion boards
The system supports up to two expansion boards at a time. Use only HP supported expansion boards
that meet the following specifications:
• Compliance
○ PCI Express x8 or x16
○ PCI-X (available only when the optional PCI-X riser board is installed)
• Form factor
○ Low-profile
○ Standard height/full-length
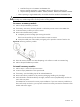
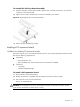
To install a PCI expansion board:
1. Remove the PCI riser board assembly.
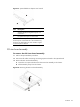
2. Identify the slot that is compatible with the expansion board you intend to install.
3. Pull out the slot cover from the selected slot.
Store it for reassembly later.
CAUTION: Do not discard the slot cover. If the expansion board is removed in the future, the slot
cover must be reinstalled to maintain proper cooling.