
HP ProLiant DL140 Generation 3 Server Maintenance and Service Guide


Contents 50
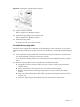
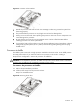
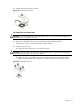
3. Engage the load lever back into place.
Figure 34 Installing the processor
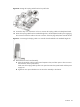
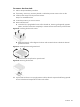
To install the new heat sink:
CAUTION: To prevent overheating or a possible system crash, use only a heat sink specified for the
HP ProLiant ML110 Generation 5 Server.
1. Remove and discard the plastic cover protecting the thermal interface material.
Be careful not to touch or scratch the thermal interface material.
2. Install the new heat sink.
a. Align then insert the heat sink on top of the processor.
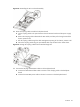
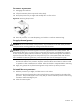
CAUTION: Do not over tighten the heat sink’s spring loaded screws to prevent them from breaking
off. A maximum torque of 6 in lb is set for the system.
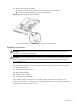
b. Tighten the four spring-loaded screws a few threads in, observing a diagonally opposite
pattern, and then tighten them completely to secure the heat sink to the processor base.
Figure 35 Installing a heat sink