
HP ProLiant DL140 Generation 3 Server Maintenance and Service Guide


Contents 48
To remove the heat sink:
1. Perform the pre-installation procedure.
2. If necessary, remove any accessory boards or cables that prevent access to the air duct.
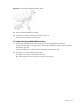
3. Lift the air duct away from the processor sockets.
Keep it for reinstallation later.
4. Locate the processor you want to remove.
5. Remove the heat sink.
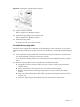
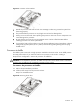
a. Loosen the four spring-loaded screws a few threads out, observing a diagonally opposite
pattern, and then loosen them completely to release the heat sink from the processor base.
Figure 30 Loosening the heat sink screws
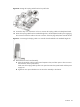
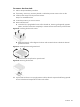
b. Rotate the heat sink a few degrees clockwise and counterclockwise to break the thermal
grease bond loose.
Figure 31 Breaking the thermal grease bond
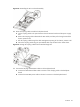
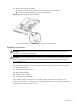
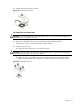
c. Lift the heat sink away from the system board.
Figure 32 Removing the heat sink
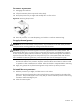
6. Lay the heat sink down in an upright position with the thermal compound side facing upward.
Do not let the thermal compound touch the work surface.