
ProLiant DL140 Generation 2 Server Maintenance and Service Guide

Removal and replacement procedures 28
To remove a processor:
CAUTION: To reduce the risk of personal injury from hot surfaces, allow the heat sink and the processor to
cool before touching them.
1. Perform the pre-installation procedure.
2. If necessary, remove any accessory boards or cables that prevent access to the air duct.
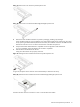
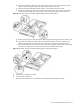
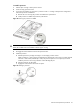
3. Lift the air duct away from the processor sockets.
Keep it for reinstallation later.
Figure 33 Removing the air duct
4. Locate the processor you want to remove.
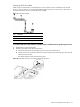
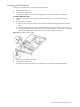
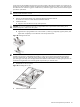
5. Remove the heat sink.
a. Loosen the four spring-loaded screws a few threads out, observing a diagonally opposite pattern, then
loosen them completely to release the heat sink from the processor base.
b. Lift the heat sink away from the system board.
Figure 34 Removing the heat sink
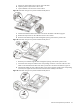
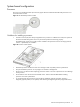
6. Remove the processor.
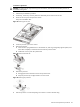
a. Disengage the socket retention lever from the processor base.
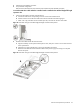
b. Grasp the processor by its edges and lift it out of its socket.
Figure 35 Removing the processor
7. Place the processor on a static-dissipating work surface or inside an anti-static bag.