
HP ProLiant BL420c Gen8 Server Blade MSG


Removal and replacement procedures 43
4.
Remove the NAND flash module ("NAND flash module for the Smart Array P220i Controller" on page
38) and capacitor pack ("FBWC procedures" on page 39) from the failed server blade, and install the
NAND flash module and capacitor pack in the recovery server blade.
5. Power up the recovery server blade.
If data was saved on the NAND flash module, then a 1792 POST message appears, stating that valid
data was flushed from the cache. This data is now stored on the drives in the recovery server blade.
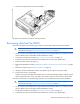
Front panel/drive cage assembly
To remove the component:
1. Power down the server blade (on page 22).
2. Remove the server blade (on page 23).
3. Remove the access panel ("Access panel" on page 24).
4. Remove all hard drives ("Drive" on page 25).
5. Remove all hard drive blanks ("Drive blank" on page 25).
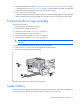
6. Remove the SAS controller ("SAS controller" on page 27).
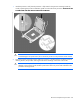
CAUTION: Always remove the SAS controller before removing the front panel/drive cage
assembly.
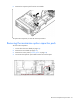
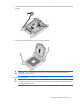
7. Extend the serial label pull tab from the front of the server blade.
8. Remove the two T-15 screws from the front panel/drive cage assembly.
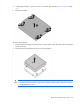
9. Remove the front panel/drive cage assembly.
To replace the component, reverse the removal procedure.
System battery
If the server blade no longer automatically displays the correct date and time, then replace the battery that
provides power to the real-time clock. Under normal use, battery life is 5 to 10 years.