
ProLiant BL e-Class C-GbE Interconnect Switch Web-based Interface Reference Guide


Overview
1-8 HP ProLiant BL e-Class C-GbE Interconnect Switch Web-based Interface Reference Guide
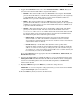
5. Click OK at the Enter Network Password dialog box. No initial user name or password
is set for the first user. The main page in the Web-based management module is
displayed.
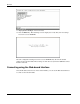
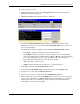
The main page displays the main menu, an active graphic of the switch module, and the
TCP/IP Parameters Setup window.
The active graphic of the switch module allows you to monitor the switch module status.
Graphical LEDs display current link speed and activity. Graphical RJ-45 connectors
allow you to display statistics for individual ports. In addition the current time displays,
once it is configured on the switch module.
Refer to the section “Configuring the Switch Module Date and Time” for information on
how to set the date and time. Refer to the section, “Monitoring the Switch Module Using
the Active Switch Graphic,” for detailed information about the active graphic.
The TCP/IP Parameters Setup window is used to determine whether the interconnect
switch should get its IP address settings from the user (Manual), a BOOTP server, or a
DHCP server. Refer to the section “Configuring the Remote Management IP Interface
Settings.”
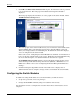
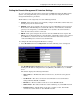
6. Click the small square hyperlink to the left of the folder icons to display a list of
additional menus used to configure, manage, monitor, and maintain the switch module.
Configuring the Switch Modules
In addition to setting the IP address for each switch module, you will also want to
•
•
Set up users, passwords, and access privileges
Change default SNMP community strings for read/write and read-only
For information on how to configure these and other interconnect switch features, refer to
Chapter 2.