
9.3 HP Pay per use Utility Meter II Software Installation and Configuration Guide (July 2011)
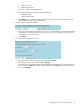

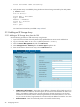
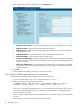

• CV EVA Instance IP/Hostname – Enter either the IP address or hostname of the EVA Command
View server. If CV EVA and CVAE are installed on the same system, do not use the same hostname
for both in this field. In case DNS is enabled on the network segment for the URS environment, use
the short hostname for the CV EVA instance and the long hostname for the CVAE instance or vice
versa. Or you can use the short/long hostname for CV EVA and the IP address for CVAE or vice
versa.
• CV EVA Instance Info – (optional text to be associated with this device) Enter a description for the
CV EVA.
• EVA Array Name – Enter the user-friendly name of the EVA disk array.
• SSSU Location – Enter the directory path to the instance of SSSU that will be used for the EVA disk
array being added.
• Username for CV EVA – Enter the username that can be used to log on to the CV EVA. Contact
the System Administrator or HP engineer who installed CV EVA for the username.
• Password for CV EVA – Enter the password that can be used to log on to the CV EVA. Contact the
System Administrator or HP engineer who installed CV EVA for the password.
6. Click Add.
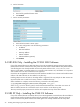
7. Verify the EVA array was added by checking for it in the left menu tree.
3.1.2.2 Adding an EVA Storage Array from the Command Line
Use the following procedure to add an EVA array using the command line:
1. Log on to the Utility Meter as user umeter (default password: h.lnxmtr).
2. Add the EVA array using the following command:
$ umadmin adddev -name deviceName -type URSEVA -address IPAddress
-username userName -path path [-info info]
where path is the path to SSSU, and IPAddress is either the fully qualified domain name or IP address
of the CV EVA managing the device. The -info parameter is optional.
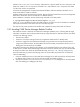
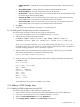
3. When prompted, enter the password for the specified userName required to log on to the CV EVA.
After entering the password, you should see the following output:
3.1 Adding Devices 27