
9.2 HP Pay per use Utility Meter II Software Installation and Configuration Guide (December 2010)


2.3 Configuring the Utility Meter Parameters
The Utility Meter software can be configured using the GUI or by using the umadmin configure command.
The following values must be configured before any data can be sent to HP:
• SMTP or HTTPS transport
• Customer contact email address
• Date and time
• Hostname
• Network parameters
2.3.1 Configuring the Utility Meter Parameters from the Command Line
Use the following procedure to configure the Utility Meter using the command line:
1. Login to the Utility Meter as user umeter (default password: h.lnxmtr) and enter the umadmin
configure command.
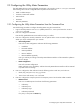
2. Enter 1 to configure the hostname.
Enter the fully qualified domain name and then enter y to confirm.
3. Enter 2 to configure the network parameters. You can perform either a static or DHCP configuration.
Which you choose will depend on your network:
• Static Configuration:
Enter 1 for a static configuration and enter the following parameters:
• IP Address
• Net Mask Address
• Gateway Address
• DNS #1 Address
• DNS #2 Address (optional)
Enter y to confirm your settings. The Utility Meter Ethernet interface will be restarted to update to
the new settings.
• DHCP Configuration:
Enter 2 for a DHCP configuration.
DHCP configures a new IP address, and then the Utility Meter Ethernet interface will be restarted
to update to the new settings.
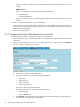
4. Enter 3 to configure the date and time. Enter the following values in UTC time, not local time:
• Month, day, and year in mm/dd/yyyy format
• Time in hours and minutes, in hh:mm format
5. Enter 4 to configure the transport protocol. The transport protocol can be either HTTPS or SMTP:
• HTTPS Protocol:
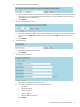
Enter 1 to use HTTPS protocol and enter the following parameters:
• HTTP Proxy
• HTTP Proxy Port
• HTTP Proxy Login
• HTTP Proxy Password
If no proxy is used press the Enter key.
2.3 Configuring the Utility Meter Parameters 17