
9.2 HP Pay per use Utility Meter II Software Installation and Configuration Guide (December 2010)


2 Installing and Configuring the Utility Meter Software
This chapter provides information about installing and configuring the Utility Meter software.
2.1 Obtaining the Utility Meter Software
Download the latest version of the HP Pay per use Utility Meter II software from the HP Software Depot web
site http://software.hp.com. Search for product number T2258AA. The Software Depot download is an ISO
image that includes a hardened version of Red Hat Enterprise Linux Server and the Utility Meter software.
Follow the instructions in the next section to install the Utility Meter software.
2.2 Installing the Utility Meter Software
The Utility Meter software is an ISO image and can be installed in one of two ways:
• By burning the image to a CD and then installing the software from the CD. See Section 2.2.1: “Installing
Using a CD”.
• By using Integrated Lights-Out (iLO) to install the image. See Section 2.2.2: “Installing Using Integrated
Lights-Out”.
2.2.1 Installing Using a CD
Follow this procedure to install the Utility Meter software from a CD-ROM:
1. Burn the Utility Meter software ISO image onto a CD.
2. Insert the Utility Meter software CD into the CD/DVD drive on the DL 320 server.
3. Reset the system.
4. Ensure the CD-ROM will be on the top of the boot order:
a. Go to the ROM-based setup utility by pressing F9 after you power-on the system.
b. Go to Standard Boot Order (IPL) option and make sure IPL:1 is set to CD-ROM. If not, move the
CD-ROM to the top.
5. The Utility Meter software installation will start automatically. Watch the console for any installation
errors.
6. Once the installation is completed, the system will reboot automatically.
IMPORTANT: The CD should automatically eject after the install is complete. If the CD does not eject,
make sure to eject the CD before the system reboots, otherwise the installation will begin again.
2.2.2 Installing Using Integrated Lights-Out
Follow this procedure to install the Utility Meter software using Integrated Lights-Out (iLO):
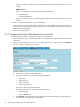
1. Use Firefox or Internet Explorer to set up the Utility Meter software image. Log into iLO using the
credentials (URL, Username, and Password) that are located on the tag that comes with the DL 320
server.
2. Select the Virtual Media tab and then on that tab select Virtual Media Applet. A virtual media (Java
Dialog) will pop up.
a. Select Local Image File in the Virtual CD/DVD-ROM section.
b. Click Browse to locate the ISO image that you obtained in “Obtaining the Utility Meter Software”.
c. Click Connect.
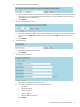
3. Return to the iLO window and select the Remote Console tab and click the Remote Console link. A
Remote Console will open.
4. Go back to the iLO window and select the Power Management tab.
5. Click Reset or Cold Boot.
6. The Utility Meter software installation will start. Watch the console for any installation errors.
2.1 Obtaining the Utility Meter Software 15