
8.16 HP Utility Meter User's Guide (June 2010)

NOTE: You can only remove a device (Command View server, PPU partition, or SAN switch) from
the Utility Meter.
• You cannot remove a physical disk array that belongs to a CV instance. When you remove a CV
instance, all of its associated physical disk arrays are automatically removed from the Utility Meter.
To configure a disk array so that its usage is no longer metered by the Utility Meter, change the
status of the disk array from URS Device to Non-URS Device in the Modify Device dialog
box. For details, see “Modify Device”.
• You cannot remove a physical switch that is maintained by an HP/Brocade SMI-S Agent. When
you remove an HP/Brocade SMI-S Agent, all of its associated switches are automatically removed
from the Utility Meter.
To configure an HP/Brocade switch so that its usage is no longer metered by the Utility Meter,
change the status of the switch by unchecking its Metered checkbox in the Modify Device
dialog box. For details, see “Modify Device”.
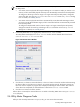
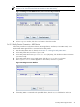
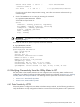
4. In the Utility Meter GUI Tasks (right) pane, click the Remove Device button.
The Utility Meter GUI displays the Remove Device window with the selected device listed in the
Confirm devices to be removed table.
Figure 3-23 Remove Device Window
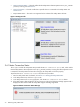
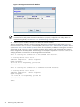
5. Click the Remove button to remove the device, or the Done button to close the window without removing
the device. After you click the Remove button, you cannot stop the removal. The device removal can
take some time to complete. A progress bar is displayed indicating the removal status. After removal
of the device has completed, the removed device is listed in the Devices removed table.
6. Click the Done button to close the window.
After a device is removed, the removed device is not visible in the Utility Meter GUI's Managed Devices
Tree (left pane).
3.6 Utility Meter Diagnose Tasks
After you click the Utility Meter GUI's Diagnose tab, you can access these user tasks:
3.6 Utility Meter Diagnose Tasks 71