
8.16 HP Utility Meter User's Guide (June 2010)
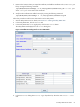
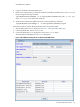
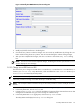
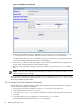
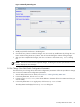
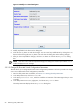
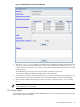
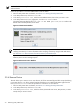

Figure 3-16 Modify PPU WBEM Partition/Server Dialog Box
5. Modify any fields for the device in the dialog box.
6. Click the Modify button to make the changes. You can cancel any modifications by clicking the Done
button without clicking the Modify button. This will close the dialog box without making changes.
7. After you have completed the changes, click the Done button to close the Modify Device dialog
box.
NOTE: If an error occurs with the requested changes, the dialog box remains open and the Status
window displays the error message.
3.5.2.2 Change a non-URS Device to URS
This task allows you to change a non-URS device to a URS device, or a URS device to a non-URS device, in
the Managed Devices Tree. Only URS devices, which are labeled as a URS Device in the Managed
Devices Tree, are metered by the Utility Meter.
NOTE: You can also modify other device fields in the Modify Device dialog box.
Follow this procedure to change a non-URS disk array to a URS disk array.
NOTE: This example modifies an EVA disk array, but the same procedure is used to modify XP and VLS
devices.
1. Start the Utility Meter GUI. For details, see Section 3.1: “Starting the Utility Meter GUI”.
2. In the Utility Meter GUI, click the Devices tab.
3. In the Managed Devices Tree, select the IP address or hostname of the Command View server that
manages the non-URS disk array you want to change to a URS disk array.
4. In the Utility Meter GUI Tasks (right) pane, click the Modify Device button.
The Utility Meter GUI displays the Modify Device dialog box.
3.5 Utility Meter Devices Tasks 65