
8.16 HP Utility Meter User's Guide (June 2010)
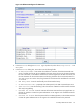


IMPORTANT: Enter the CV XP AE Device Manager's account that was created for exclusive use
by the Utility Meter into the Username for CV XP AE and Password for CV XP AE fields.
For details, see Section 2.8.1: “Avoiding CV XP AE Device Manager Refresh Conflicts”.
• Password for CV XP AE – Enter the password of the CV XP AE application on the CV XP AE
machine. Contact the System Administrator or HP engineer who installed CV EVA for the password.
6. Click the Add button. An information message appears in the Status window. If no errors occur, the
XP device is added in the left pane of the GUI. If an error occurs, the Status window displays the
error message.
7. To add another XP disk array, repeat this procedure starting with Step 4; otherwise, click the Done
button to close the Add Device dialog box.
IMPORTANT: Prior to adding any XP devices, you can click the Done button to close the window without
making any additions. However, after you click the Add button, the entries are accepted. (To remove a
previously added XP device from the Managed Devices Tree, use the Remove Device task in the
Devices tab of the Utility Meter GUI. For more information about removing devices, see Section 3.5.4:
“Remove Device”.)
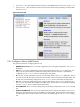
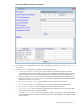
After you have added a CVAE instance into the Utility Meter the IP address or hostname appears in the
Managed Devices Tree. Note that the green circle to the left of the IP address indicates that the XP
device is connected to the Utility Meter.
IMPORTANT: A newly added XP device that is correctly configured in the Utility Meter has a green circle
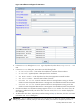
next to the XP Command View (CV) server's IP address in the Managed Devices Tree. For an example
of a correctly configured device, see Figure 3-3: “Utility Meter GUI Managed Devices Tree”. If the CVAE IP
address has a red box next to it, the device did not have an associated disk array correctly configured into
the Utility Meter. To resolve this problem, see Section 5.4: “Fixing a Disconnected Device (with Red Box)”.
IMPORTANT: Registering an XP in CV XP AE with its two SVP IP addresses is not supported in URS.
3.5.1.4 Add a VLS Device
This task allows you to add one or more VLS devices to the Utility Meter. The configured VLS devices are
visible in the Utility Meter GUI's Managed Devices Tree in the Managed Devices (left) pane.
Follow the procedure in this section if the CV server (VLS device) that manages the physical VLS is not
configured and is not visible in the Utility Meter GUI's Managed Devices Tree.
If a VLS device is already configured and visible in the Utility Meter GUI's Managed Devices Tree, but
the VLS device appears as a Non-URS Device in the Utility Meter GUI's Managed Devices Tree,
follow the instructions in Section 3.5.2.2: “Change a non-URS Device to URS”.
IMPORTANT: When adding a VLS device, the user will have to specify the login and password for Node0
which is the head node for the VLS. The Utility Meter will use the credentials specified to verify it can access
the VLS. For the subsequent data collections, SSH without passwords will be used to access the VLS. See
Section 2.9: “URS VLS Devices Only – Configuring SSH Communication”
Follow this procedure to add a VLS device into the Utility Meter:
1. Start the Utility Meter GUI. For details, see Section 3.1: “Starting the Utility Meter GUI”.
2. In the Utility Meter GUI, click the Devices tab.
3. In the Utility Meter GUI Tasks (right) pane, click the Add Device button.
The Utility Meter GUI displays the Add Device dialog box.
58 Performing Utility Meter Tasks