
8.15 HP Utility Meter User's Guide (January 2010)


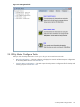


Table Of Contents
- HP Utility Meter User's Guide for version 8.15
- Table of Contents
- About This Document
- 1 Introduction
- 2 Installing and Configuring the Utility Meter Software
- 2.1 Overview
- 2.2 Skills Required
- 2.3 Before Going to the Customer Site
- 2.4 Configuring the HP-UX System Parameters
- 2.5 Obtaining and Installing the Utility Meter Software
- 2.6 Configuring the Utility Meter Parameters
- 2.7 URS XP Only – Installing the CV XP AE CLI Software
- 2.8 URS EVA Only – Installing the CV EVA SSSU Software
- 2.9 URS HP/Brocade SAN Switch Only – Installing the SMI-S Agent Software
- 2.10 URS Cisco SAN Switch Only – Enabling the CIM Server
- 2.11 Email Hostname Masquerading
- 2.12 Configuring PPU Partitions and URS Devices
- 2.13 Verifying the Utility Meter Operation
- 2.14 Completing the Utility Meter Installation and Configuration
- 2.15 Upgrading the Utility Meter Software to Version 8.15
- 3 Performing Utility Meter Tasks
- 4 Verifying Utility Meter Operation
- 4.1 Verifying the Utility Meter Hardware is Operational
- 4.2 Verifying the Utility Meter Software is Operational
- 4.3 Verifying the CIM Server Software Is Operational
- 4.4 Verifying Connectivity from the Utility Meter to HP
- 4.5 Verifying the Data Acquisition Server is Running
- 4.6 Verifying the Utility Meter Data Transport Method
- 4.7 Verifying a PPU Partition
- 4.8 Verifying a Storage Device
- 4.8.1 Verifying a Device is Configured in the Utility Meter
- 4.8.2 Verifying a Device is Connected to the Utility Meter
- 4.8.3 Verifying the Connection from the Utility Meter to HP
- 4.8.4 XP Only – Verifying the Correct Version of CV XP AE CLI is Installed
- 4.8.5 EVA Only – Verifying the Correct Version of CV EVA SSSU is Installed
- 4.9 Verifying a SAN Device
- 5 Troubleshooting the Utility Meter
- A Site Preparation Form for Pay Per Use
- B Site Preparation Form for Utility Ready Storage
- C Data Fields Sent from the Utility Meter to HP
- Glossary
- Index

3.4.1.1 Utility Meter Software Parameters
NOTE: Many of the following Utility Meter software parameters are automatically filled in when you display
the Network Configuration dialog box. Changing the value of these fields does not change the value
of any HP-UX system parameters.
The following Utility Meter software parameters are in the Network Configuration dialog box:
• Utility Meter ID – the serial number of the Utility Meter hardware (non-editable)
• Hardware ID – copied from the Utility Meter ID (non-editable)
• Hostname – the Utility Meter's host name, for example, “machinename”
• Domain Name – the domain in which the Utility Meter is installed, for example, “location.company.com”
• IP Address – of the Utility Meter, for example, “10.x.x.x”
• Netmask – of the Utility Meter, for example, “255.255.255.0”
• Gateway – of the Utility Meter (which is used to communicate with all of the PPU and URS devices) for
example, “10.x.x.x”
• Primary DNS – for the primary domain name server (DNS) on the network where the Utility Meter is
installed, for example, “10.x.x.x”
• Secondary DNS – (optional) for the secondary DNS, for example, “10.x.x.x”
• Tertiary DNS – (optional) for the tertiary DNS, for example, “10.x.x.x”
• Meter Contact Email – the email address of the Utility Meter contact, for example,
“name@company.com”. Up to 10 email addresses can be entered, delimited by spaces. For details of
the importance of this setting and recommendations for this field, see Section 1.8: “Missing Usage
Reports”.
NOTE: HP recommends using an email alias or an email distribution list as the contact address for
your Utility Meter.
• Transfer data through HTTPS – to transfer usage data through HTTPS, select this option by
clicking the radio button. The following data-entry fields appear when this radio button is selected:
• HTTP Proxy – the hostname.domain name of the proxy server
• Port – the port number for the proxy server
• Login – the account for the proxy server
• Passwd – the password for the proxy server's account
• Destination URL – this field is predefined and cannot be changed
• Transfer data through email – to transfer usage data through email, select this option by
clicking the radio button. The following data-entry fields appear when this radio button is selected:
• Email Address – display field only
• Email Subject – display field only
• Email Host – the customer's outbound email relay (optional)
• Email MXS Domain – the fully qualified domain name for sending email (must be resolvable in
DNS)
• Email Sender – umeter (do not change this field)
3.4 Utility Meter Configure Tasks 47