
HPOS 3.5 SAPConnect

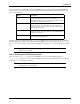

HP Output Server 28
SAPConnect
Configuring fax and e-mail with HP SAPConnect server
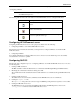
This prompts the SAPconnect: Explanation of Routing and Address Conversion screen, which provides a full
description of each component of the SAPconnect node connection.
NOTE: After you run the routing test, return to the previous screen and press Enter. This should
retrieve the Node and Recipient addr. values in the Outbound node and modified
recipient address window.
Task 4: Creating a test fax or e-mail request
Fax documents and e-mail messages can be created and delivered through SAPconnect.
To deliver a fax document or e-mail message, perform the following steps:
Create the document to send
1. In the Command field, type /nsbwp.
The Business Workplace screen appears:
2. Click New message.
The Create Document and Send screen appears.
3. Enter a document title and a description of the document contents.
4. Enter the country and fax number of your choice in the Recipient column and choose Fax number in the Recip.
type column.
For e-mail, type the e-mail address in the Recipient column and select Internet address in the Recip. type
column.
5. Click Send (Shift+F8).
Initiate the send process in SAPconnect
In order to send the document through SAPconnect for testing, you need to initiate the send from the SAPconnect:
Administration screen. To do this, perform the following steps:
1. In the Command field, type /nscon.
The SAPconnect: Administration (system status) screen appears.
2. Click Start send process.
The SAPconnect Send Process: Change Parameters screen appears.
3. In the Addr Type field, select FAX Fax number.
4. Click Start.
You can observe the status of your fax request in the Business Workplace screen or in Job Tracker.
For copyright information about this documentation, please refer to the HP Output Management for SAP Release
Notes.