
HPOS 3.5 SAPConnect


HP Output Server 19
SAPConnect
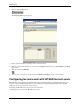
Configuring fax and e-mail with HP SAPConnect server
• Configuring SAPoffice
NOTE: The menu references and screen images in this section are from SAP GUI version 6.40,
and SAP R/3 Enterprise 4.7.
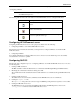
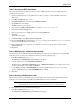
The following table describes each of the buttons in the SAP GUI that you use to configure SAPconnect:
Configuring HP SAPconnect server
Configuring an HP SAPconnect server is a two-part process that involves the following:
1. Configuring SAP R/3 to work with the HP SAPconnect server
The following section describes the tasks that you must perform to configure SAP R/3 to work with the HP
SAPconnect server.
2. Configuring SAPoffice
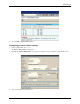
You configure SAPoffice by testing the SAPconnect node connection to ensure that all steps were successfully
executed and the connection is operable.
Configuring SAP R/3
The first part of the configuration process—configuring SAP R/3 to work with the HP SAPconnect server—involves
the following tasks:
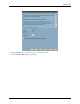
1. Creating an RFC destination.
The RFC destination enables the R/3 interface to communicate with HP Output Management RFC interface.
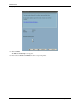
2. Modifying the communication method for faxing and e-mail.
The communication method enables the fax and e-mail destinations to communicate through the HP SAPconnect
server.
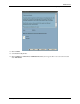
3. Creating a SAPconnect node.
The SAPconnect node is the means by which R/3 and the HP SAPconnect server communicate.
4. Creating the saprfc.ini file.
The saprfc.ini file specifies the connection type and all RFC-specific parameters required to connect to R/3.
5. Creating the HP SAPconnect server.
The HP SAPconnect server integrates the SAP BC-CON interface with HP Output Server. You use the
config_server command to create the HP SAPconnect server.
SAP GUI Button Description
The Create button in the SAP GUI allows you to create new
objects.
The Save button in the SAP GUI saves any changes you have
made to the SAP instance.
The Start send process button starts the SAPconnect sending
process for a particular address type.