
HP OneView for VMware vCenter Installation Guide (7.4)

NOTE: The VASA provider for HP 3PAR StoreServ is installed when the HP OneView
for VMware vCenter module is installed.
NOTE: All the modules must be installed on the same server. If you are performing a
customized installation, ensure that all the modules are installed on the same server.
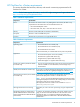
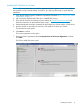
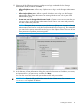
The Support Data License Agreement dialog opens.
10. Review the license agreement, select I accept the terms of the License Agreement, and then
click Next.
HP OneView for VMware vCenter gathers information about your VMware environment and
sends it to HP. This information helps with product support and will help to improve the product
in future releases. The collected data is anonymous and nonintrusive; it does not contain any
sensitive information about the user or the environment. The data is encrypted before it is sent
to a secure HP FTP site.
A copy of the collected data is saved in non-encrypted form in the directory
<installationdirectory>/JBoss/standalone/Logs/Reports.
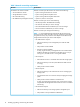
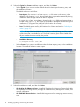
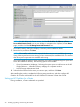
The Support Data Configuration dialog box opens.
11. Do one of the following:
• If you have an FTP proxy server, select Yes, enter the proxy server name or IP address
and the port number, and then click Next. The installer will verify that it is able to connect
with HP's FTP server via proxy server.
• If you do not have an FTP proxy server, select No, and then click Next.
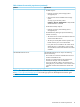
12. If the Typical installation option was selected, the Storage Administration Portal Credentials
dialog box opens. Proceed to step 15.
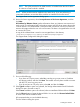
If the Custom installation option was selected, select an installation folder and then click Next.
Use the Choose button to locate the desired folder. You can also click Restore Default Folder
to revert to the default installation folder.
HP recommends that you use the default directory.
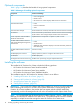
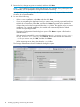
The Port Selection dialog box opens.
Installing the software 17