
HP Insight Control for VMware vCenter Installation Guide (7.1)
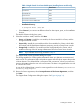
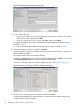
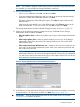
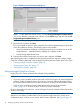
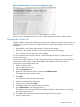
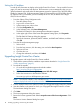
Table Of Contents
- HP Insight Control for VMware vCenter Server
- Contents
- 1 Overview
- 2 Installing, upgrading, and removing the software
- 3 Support and other resources
- 4 Documentation feedback
- Glossary
- Index

8. Click Next.
The uninstall program for the Storage Module for vCenter starts.
During the Storage Module for vCenter uninstall process, export the Storage Module data to
the default location (C:\Storage Integration). If you export the data to the default
location, it will be imported automatically when you install Insight Control for vCenter 7.1.
9. Exit the Storage Module for vCenter uninstall program.
The uninstall program for the Server Module for vCenter starts.
During the Server Module for vCenter uninstall process, export the Server Module data to the
default location (C:\temp\icvc). If you export the data to the default location, it will be
imported automatically when you install Insight Control for vCenter 7.1.
10. Start the Insight Control for vCenter installer for the newer version. For installation instructions,
see “Installing Insight Control for vCenter” (page 11).
Removing the software
If the Storage Module for vCenter is installed, when you remove Insight Control for vCenter, the
Storage Module data is exported automatically to an export.si file that is saved in the installation
directory.
To remove Insight Control for vCenter:
1. Select Start→All Programs→HP Insight Control for vCenter→Uninstall HP Insight Control for
vCenter.
TIP: You can also start the uninstall process from the Windows Control Panel.
The Uninstall HP Insight Control for vCenter dialog box opens.
2. Do one of the following:
• If you installed the product with a typical install, click Uninstall.
The program is removed and the Uninstall Complete dialog box opens. Proceed to Step
5.
• If you installed the product with a custom install, click Next.
The installer prompts you to export Insight Control for vCenter data. Proceed to Step 3.
3. Do one of the following:
• If you do not want to export the data, select No, and then click Next.
• If you want to export the data, select Yes, and then click Next.
A dialog box displays the default directory for exporting the data. Optionally, click Choose
to select a different directory, or click Restore Default to revert to the default directory.
Click Next.
4. Click Uninstall.
5. When prompted to restart the system, select either Yes or No, and then click Done.
Removing the software 19