
HP Superdome 2 Partitioning Administrator Guide
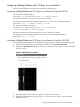
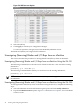
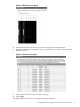
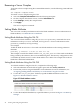

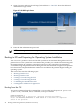
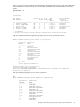


Figure 5-4 IOX Resources Option
5. Select the I/O bay.
6. Click Apply to commit your configuration changes.
To cancel an operation, navigate away from the Modify nPartition screen.
The blades and I/O bay are assigned to the nPartition.
Unassigning (Removing) Blades and I/O Bays from an nPartition
This section describes the procedure to unassign blades and I/O bays from an nPartition.
Unassigning (Removing) Blades and I/O Bays from an nPartition Using the OA CLI
The following command shows the removal of a blade in enclosure 1 slot 3 from the existing
nPartition 2:
parmodify -p 2 -d blade:1/3
The following command deletes I/O bay 1 in enclosure 6 to the existing nPartition 2:
parmodify -p 2 -d io:6/1
NOTE: If the nPartition is active, the blades and I/O bays are unassigned at the next reboot of
the nPartition.
Unassigning (Removing) Blades and I/O Bays from an nPartition Using the OA GUI
To unassign blades and I/O bays from an nPartition using the OA GUI, complete the following
steps:
1. Select the nPartition from the left hand navigation pane and click modify nPartition.
2. Expand the Blade Resources option. Figure 5-3 “Blade Resources Option” shows the blade
resource screen.
42 Creating and Configuring nPartitions