
README for the HP Neoview Transporter Java Client (R2.5)


• export JAVA_HOME=/usr/java/jdk1.5.0_12
• export PATH=/usr/java/jdk1.5.0_12/bin:$PATH
• export JREHOME=/usr/java/jdk1.5.0_12/jre
Installing the Client Using the GUI
You install the Transporter Java client using a GUI that installs and configures the Transporter
environment.
• From a Linux, HP-UX, AIX or Solaris shell, use this command:
java -jar HP_Neoview_Transporter_Java_Client_Vx.y.z_nnnnnn_nnn.jar
• For Windows, double-click the
HP_Neoview_Transporter_Java_Client_Vx.y.z_nnnnnn_nnn.jar package on
your desktop.
If you do not have a GUI environment, the installer displays a message indicating that graphical
installers are not supported and that the console mode will be used instead. The installation will
proceed with “Installing the Client Using CONSOLE Mode” (page 8).
NOTE: If, on the Linux platform, the installed version of Java does not meet the minimum Java
version requirement, this error is returned: “Gtk-WARNING **: cannot open display:”
Use these standard buttons to navigate the installation GUI:
• Previous – return to the last screen displayed.
• Next – proceed to the following screen and continue installation.
• Quit – stop installing Transporter.
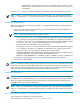
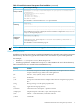
Table 1 GUI Environment Transporter Client Installation
ActionScreen
Click Next to continue installation.
1
Welcome
Read and accept the Transporter license agreement.2
License
Agreement
Enter the path to the installation folder in which you want Transporter files to be installed, or
click Browse to select from a folder list.
Click Next to accept the default name that is displayed.
You must have write permission for the directory or folder. Otherwise, the installation might
fail with an error.
3
Choose
Installation
Folder
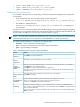
Using the check boxes, select the software packs you want installed.
Click Next to continue.
4
Choose Software
Packs
Confirm that the installation path and software packs displayed are correct.
If not, you can go back to the previous screens to make corrections.
If correct, click Install to continue the installation.
5
Pre-Installation
Summary
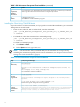
When the installation completes, you are asked whether you want to view the Readme file.
If you want to accept the default option to view the Readme file, click Next to accept the default
and view the Readme file.
If you do not want to view the Readme file, select the option to not view the Readme file. Click
Next to continue.
6
Installing
Installation of the Neoview Transporter Java Client 7