
Neoview Workload Management Services Guide (R2.5)
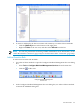
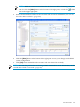

e. In the Value box, enter a value to be compared with the query runtime statistic:
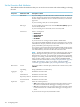
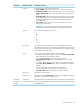
Acceptable Comparison ValueQuery Runtime Statistic
The rule expression compares the number of rows returned to the query
with this numeric value.
Enter a numeric value, or select EST_USED_ROWS from the Value list.
EST_USED_ROWS is the compiler estimate.
USED_ROWS
The rule expression compares the number of rows accessed by the query
with this numeric value.
Enter a numeric value, or select EST_ACCESSED_ROWS from the Value
list. EST_ACCESSED_ROWS is the compiler estimate.
ACCESSED_ROWS
The rule expression compares the total memory used to process the query,
in kilobytes, with this numeric value.
Enter a numeric value in kilobytes (KB), or select EST_TOTAL_MEMORY
from the Value list. EST_TOTAL_MEMORY is the compiler estimate.
TOTAL_MEM_ALLOC
The rule expression compares the elapsed time of the query execution (that
is, the time since the start of the query execution until the current time,
including any time that the query spent in the waiting, holding, or
suspended state), in minutes, with this numeric value.
Enter a numeric value in minutes.
ELAPSED_TIME
The rule expression compares the amount of processor (CPU) time, in
seconds, used by Neoview SQL for the query with this numeric value or
estimate.
Enter a numeric value in seconds, or select EST_CPU_TIME from the
Value list. EST_CPU_TIME is the compiler estimate.
CPU_TIME
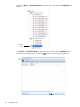
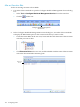
f. Click the [+ Add Expr] button to add the expression to the list in the Expression box.
To clear all the expressions and start over, click the [Clear] button.
g. To add another execution rule expression, repeat steps 7a through 7f.
NOTE: You can specify up to fifteen execution rule expressions. WMS evaluates the
expressions in the order in which you specify them.
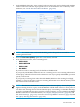
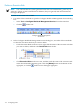
8. In the Comments box, enter optional text to describe the rule that you are creating.
NOTE: The Command Preview box displays the WMS command that will be issued when
you add the rule.
9. Click the [Add] button to add the execution rule, or click [Cancel] to quit the dialog box
without adding the rule.
10. Click [OK] when notified that the execution rule was added successfully.
11. When you are done adding execution rules, close the Add Rule dialog box by clicking the
[x] icon in the upper right corner.
NOTE: You can also perform this task using a WMS command. For more information, see the
“ADD RULE EXEC Command” (page 182).
After adding a rule, you can view the Rule Details by clicking the name of the rule in the tree
view.
Execution Rules 105