README for the HP Neoview Reports Client HP Part Number: 573010-001 Published: April 2009 Edition: HP Neoview Release 2.
© Copyright 2009 Hewlett-Packard Development Company, L.P. Legal Notice Confidential computer software. Valid license from HP required for possession, use or copying. Consistent with FAR 12.211 and 12.212, Commercial Computer Software, Computer Software Documentation, and Technical Data for Commercial Items are licensed to the U.S. Government under vendor’s standard commercial license. The information contained herein is subject to change without notice.
Table of Contents Checking Version Compatibility............................................................................................................5 Installation for Neoview Release 2.4......................................................................................................5 Installation Package...........................................................................................................................5 Installation Requirements............................................
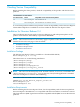
Checking Version Compatibility Before installing the client product, check the compatibility of the product with the Neoview platform. Neoview Release of Client Product the Client Product Name Compatible versions of the Neoview platform 2.4 Neoview Reports Neoview Release 2.4 2.3 Neoview Reports Neoview Release 2.
Installation Instructions Installing the HP Neoview Reports Client 1. 2. Unzip NeoviewReports_2.4..zip into C:\ using the WinZip Extract tool or the built-in Zip file supported in Windows XP and later operating systems. All files are placed into C:\NeoviewReports\. Run the Neoview Reports installation file, InstallNVReports.bat.
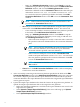
2. A MS-DOS prompt will open. Wait a few seconds for the HP Neoview Reports tool to appear. a. If you have previously installed the HP Neoview Reports Client and there are connection definitions persisting from a previous session, you will see tab(s) for each connection. To use an existing connection definition that has not been used in the current session, select a connection tab. Click Set Password. This will bring up an Edit Connection Definition window.
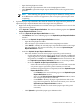
◦ ◦ Bring up a Validating Connection window. Click Cancel to stop the validation using the entries specified in the fields of the Add Connection Definition window, and close the Validating Connection window. Return the validation result in a Connection Test window that will open and indicate Connection test succeeded or Connection test failed for the Neoview platform specified in the fields of the Add Connection Definition window. Click OK to close the Connection Test window.
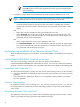
— — — Open the SampleQueries folder. Select all simple report definition files in the SampleQueries folder. Click Upload to upload the simple report definition files to the target Neoview platform. NOTE: After initiating the upload of a simple report definition, clicking Cancel in the IO window will free the application, but not stop the upload request from completing. 5. Upload all Jasper report definition files from the client to the target Neoview platform.
NOTE: After initiating the upload of a Jasper report definition, clicking Cancel in the IO window will free the application, but not stop the upload request from completing. 6. To generate a report from a report definition listed in the report definitions tree view: NOTE: Up to twenty five reports will open in Neoview Reports. Trying to open additional reports is blocked until one or more reports in the reports pane are discarded. • Double-click a report definition in the report definitions tree view.
****ERROR [4185] Select list index is not allowed to be specified in the GROUP BY clause for this query. Related Product Documentation For more information about the Neoview Reports Client, see the HP Neoview Reports Online Help that is available for use from within the HP Neoview Reports Client. The README is also available for downloading with the product.