
Neoview System Monitor Quick Start (R2.3 SP3, R2.4)


NOTE: Negative values are not supported.
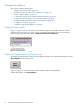
4. Click Connect to Server.
Change the Refresh Rate for Performance Metrics
The refresh rate is the amount of time that the client waits before requesting new data from the
server. However, the server does not always return the requested data immediately. For instance,
if the refresh rate is set to 5 seconds, the client requests data from the server every 5 seconds. But
the server can take an additional 2 to 4 seconds to respond with the data. In this sense, the refresh
rate is closer in definition to an update request interval.
The default refresh rate for performance metrics is 2 seconds. You can change the refresh rate to
another value in the range 2 through 500 seconds. To change the refresh rate:
1. Display the setup screen with options, as shown in “Display the Options Tabs on the Setup
Screen” (page 16).
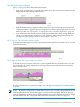
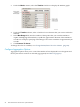
2. Click the Data Options tab. See Figure 1-4 (page 17).
3. Enter a value in the range 2 through 500 in the Data Refresh Rate field:
4. Click Connect To Server.
Configure a Timeline
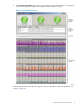
A timeline is a graphical representation of one or more metrics over time:
Timelines allow you to see trends and make historical comparisons. Note these considerations
for timelines:
• To specify the amount of time captured by the timeline, you must enter a number in the
Max Range field. This is the number of data points (intervals) that you want the timeline
to display. Data points are collected approximately every 2 seconds. Therefore, specifying
a Max Range of 50 intervals produces a timeline of about 100 seconds.
• You can configure the timeline color and the background color in the Color Options tab.
See “Change the Bar/Line Colors for a Metric” (page 22).
• You can save a timeline by recording the session. See “Record and Play Back a Session”
(page 28).
• The timeline graph has no units. The vertical scale is provided only for comparison.
To configure a timeline:
1. From the setup screen, make sure that the options are displayed, as described in “Display
the Options Tabs on the Setup Screen” (page 16).
2. Click the Data Options tab. See Figure 1-4 (page 17).
Change Data Options 19