
Neoview Database Administrator's Guide (R2.3)

6. DB Admin prompts you to confirm the alter. When you click Yes, it displays attributes for
the materialized view.
For additional information, see DB Admin online help.
Dropping (Deleting) Materialized Views
1. Start DB Admin and log on using the user ID that created the table or log on as a user
authorized to change that table.
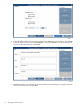
2. Click the Database tab, then navigate to a view in the left pane.
3. Right-click the view name and then select Drop. DB Admin prompts you to confirm the
drop. When you click Yes, it drops the materialized view.
For additional information, see DB Admin online help.
Materialized View Groups
Creating Materialized View Groups
When you create a materialized view, a materialized view group is created automatically. It has
the same name as the table that the materialized view references. You can also create a materialized
view group manually.
1. Start DB Admin and log on using any user ID that is authorized to access the table for which
you want to create a materialized view group.
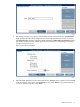
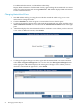
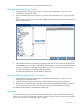
2. Click the Database tab, then right-click the schema in which you want to create a materialized
view group and select Create materialized view group to start the Create Materialized View
Group Wizard. Or, you can click Create a materialized view group in the right pane. Enter
a name for the materialized view and click Finish:
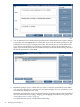
3. DB Admin prompts you to confirm that you want to create this group. When you click Yes,
it creates the materialized view group. It does not yet contain any materialized views.
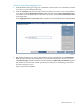
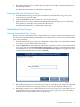
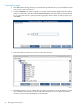
4. DB Admin prompts you to add materialized views to the group. If you select No, you can
add them later. See “Changing Materialized View Groups” (page 79). If you select Yes, it
displays the Alter Materialized View Group Wizard:
Materialized View Groups 77