
Neoview Database Administrator's Guide (R2.3)
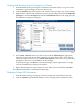
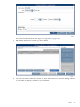

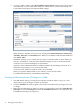

5. To create a table or tables, select Import DDL From Local File and navigate to the location
of the DDL file on your workstation. After you confirm that you want to use this file, the
Create Table Tool displays the imported DDL settings:
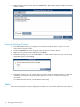
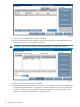
Make changes to the DDL, if necessary, by clicking the Column Definitions, Primary Key
/ Hash By, Table Size, and Attributes tabs. When you are finished with the table definition,
click Create Table.
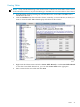
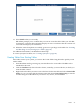
DB Admin prompts you to confirm that you want to create this table or tables. When you
click Yes, it attempts to create the table and either displays an error or indicates that the
creation was successful and displays its information.
If the file contains DDL definitions for additional tables, the tool displays the next set of
definitions and prompts you to create another table.
Close the Create Table Tool window when you are finished.
When you open the Tables folder in your schema, you see the new tables.
For additional information, see DB Admin online help.
Granting and Revoking Access (Privileges) to a Table
1. Start DB Admin and log on using the user ID that created the table, or log on as a user
authorized to grant privileges to others on that table.
2. Click the Database tab, then navigate to the schema and table whose privileges you want
to change.
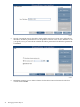
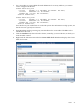
3. Right-click the table name to which you want to grant privileges and select Grant/Revoke
privileges or click the Privileges tab, then the Grant/Revoke button in the right pane. The
Grant/Revoke Privileges Tool appears:
50 Managing Database Objects