
HP StorageWorks MSA2000 G2 installation instructions (515941-002, June 2009)


Table Of Contents
- MSA2000 G2
- About this document
- Step 1: Install and secure equipment into the rack
- Site requirements
- Rack planning
- Step 2: Install hardware options
- Step 3: Connect cables
- Connecting remote management hosts
- MSA2000 G2 direct-connect configurations
- MSA2000sa G2 switch-connect configurations
- Additional drive enclosure cable requirements
- Step 4: Power on the components
- Step 5: Configure your MSA
- Additional resources
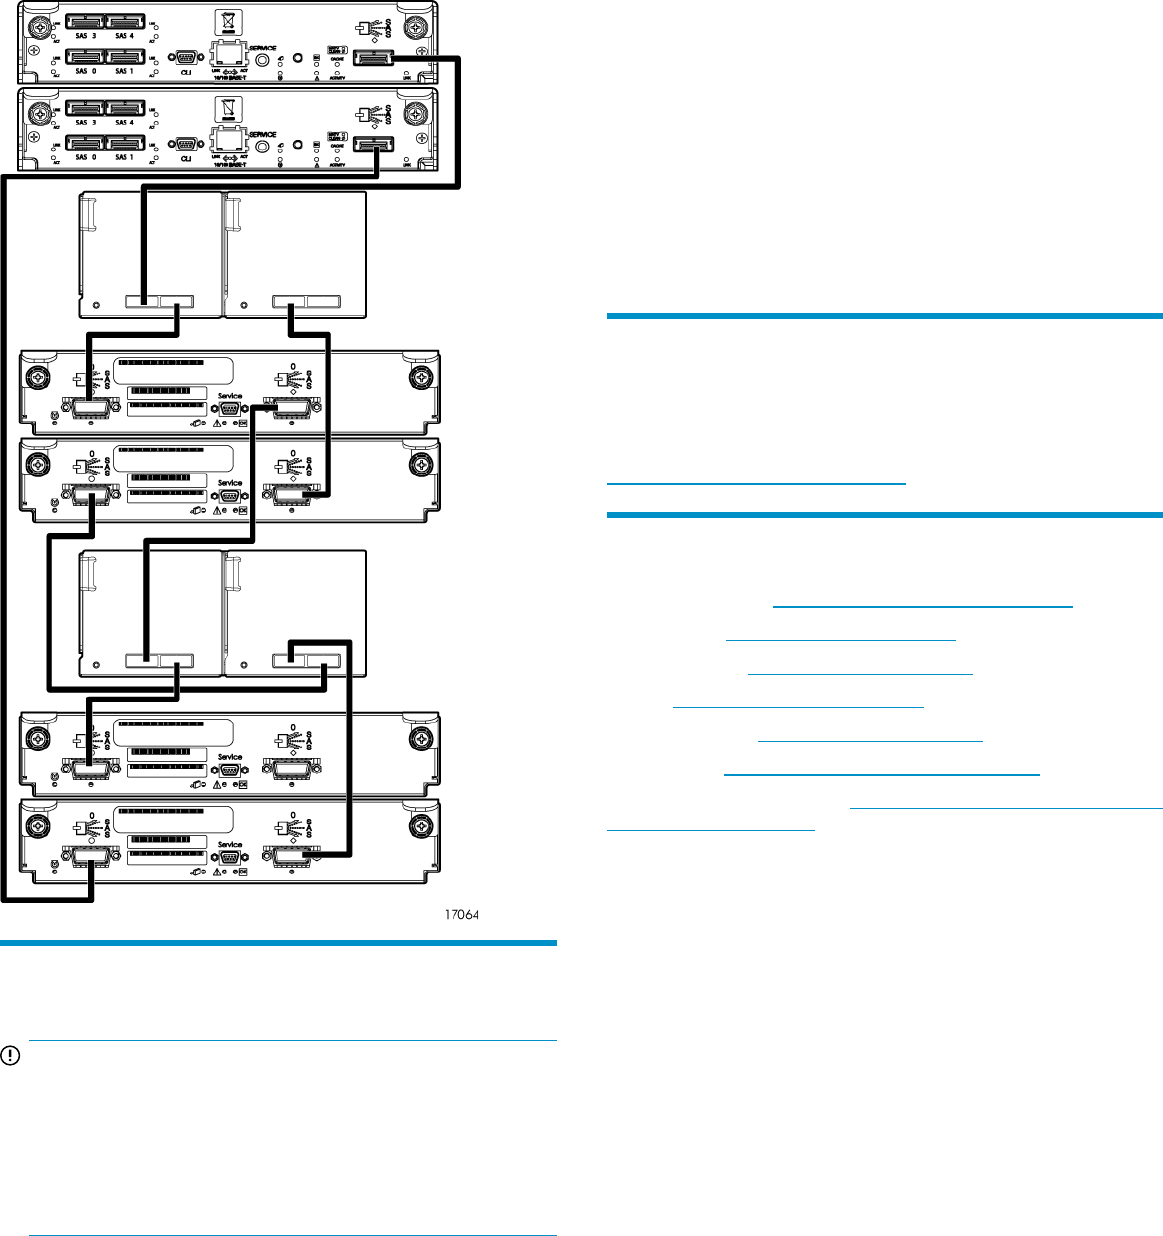
to SAS cables and one (1) mini-SAS to mini-SAS cable. Other mixed
configurations might require different cables. Refer to “MSA2000 G2
cable requirements” on page 2 for more information.
Step 4: Power on the components
IMPORTANT:
• Important safety information about power cords can be found
on the Software Support/Documentation CD provided with
your MSA chassis. To locate this information look for the Safety
and Disposal guide located on the Documents tab.
• Power on the enclosures and associated server(s) in the order
documented below.
1. Verify that all power switches are off.
2. Using the provided AC power cords, connect each power supply
module to one power source in the rack.
3. Connect the primary power cords from the rack to separate external
power sources.
4. Power on any attached MSA2000 3.5" 12-drive and MSA70 drive
enclosures.
5. Power on the MSA2000 G2 array controller.
6. Power on servers (if they are powered down for maintenance
purposes).
To power on the system:
1. Press the power switches on the back of each drive enclosure to the
On position. Wait several minutes to ensure that all drives can be
recognized by the array controller.
2. Press the power switches on the back of the array controller enclosure
to the On position.
Step 5: Configure your MSA
Refer to the user guide provided with your MSA2000 G2 for complete
configuration and setup information. The latest version of the user guide
is available at:
h
ttp://www.hp.com/support/manuals.
Additional resources
HP product manuals: http://www.hp.com/support/manuals
MSA products: http://www.hp.com/go/msa
Storage products: http://www.hp.com/storage
Servers: http://www.hp.com/go/servers
SAN infrastructure: http://www.hp.com/go/san
Ethernet NICs: http://www.hp.com/servers/networking
Web Based Enterprise Services: http://h18023.www1.hp.com/support/
svctools/webes/index.html