
HP MPX200 Data Migration Planning Guide
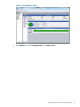
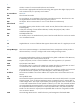

4. Complete the Create Volume wizard as follows:
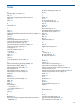
a. On Step 1 – Volume Settings, enter a volume name, select the default storage pool, and
then click Next (see Figure 76 (page 82)).
Figure 76 Creating a volume — step 1
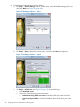
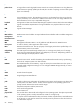
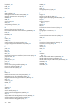
b. On Step 2 – Space, specify the volume space, and then click Next (see Figurexx).
Figure 77 Creating a volume — step 2
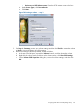
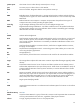
c. On Step 3 – iSCSI Access (see Figure 78 (page ?)), do the following:
i. Click Restricted access.
ii. Select one of the following access restrictions:
• Authenticate using CHAP user name. Enter the CHAP user name in the box.
• Limit access by IP address. Enter the IP address of the iSCSI router port in the
box.
82 Assigning LUNs to the MPX200 for data migration