
HP MPX200 Data Migration Planning Guide
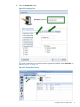
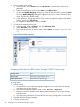
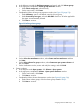
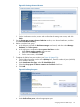
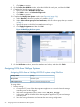
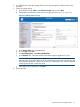
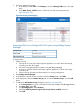
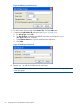

Figure 40 Defining volume characteristics
d. Complete the Define volume properties window (Figure 41 (page 54)):
i. In the Quantity box, enter the number of volumes to be created.
ii. In the Size (GB=2^30) box, enter the size of the new volumes.
iii. Optional: Click the Calculate buttons to determine the total available capacity for
creating volumes. You can specify either the Quantity or Size (capacity) of the volumes
to be created to have the utility calculate either the number of volumes that can be
created or the size of each volume to consume all the space, respectively. If you
have already planned the number and size of the volumes, skip this step.
iv. Click Next to continue.
Figure 41 Defining volume properties
e. Complete the Create volume nicknames window (see Figure 42 (page 55)):
i. In the Quantity of volumes box, enter the number of volumes to be created.
ii. Select the Generate a sequence of nicknames based on the following check box.
iii. Complete the Prefix and Suffix boxes as appropriate.
iv. Click Next to continue.
54 Assigning LUNs to the MPX200 for data migration