
HP MPX200 Data Migration Planning Guide
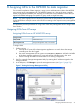
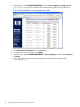
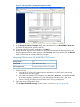
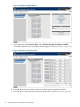
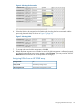

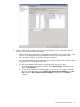
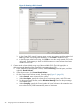
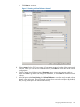
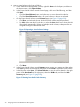

Figure 10 Creating a CPG: General
3. In the Create CPG wizard, Summary page, review your settings and then either click
Prev to go back and change the selections, or click Finish to create the CPG.
4. In the left pane under Provisioning, click CPGs to view the newly created CPG in the
right pane. Total capacity is shown as 0.00 because no virtual volumes have been
created on this CPG.
3. Create virtual volumes (LUNs) using any of the available CPGs. The LUN type (thin- or
thick-provisioned) determines the actual disk consumption by a CPG.
a. In the 3PAR Inform Management Console, select Provisioning in the left pane, and then
right-click Virtual Volumes.
b. In the shortcut menu, click Create Virtual Volume.
c. On the Create Virtual Volume wizard, General page (Figure 11 (page 29):
i. Under General, enter a Name for the volume.
ii. Under User Space, specify the volume Size, Provisioning option, and CPG name.
iii. For thin-provisioned volumes, set the Allocation Warning based on the percentage
of available space.
iv. Under Grouping, specify the Count (number of virtual volumes to be created at one
time within the set). 3PAR automatically enters a Set Name.
28 Assigning LUNs to the MPX200 for data migration