
Qlogic VMware Online Data Migration Service Using the iSR6200 Applications Note (ISR651401-00 A, December 2011)

5 – Presenting Destination LUNs on VMware ESX 4.0
ISR651401-00 A 5
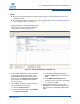
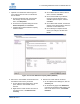
then on the shortcut menu, click Browse
Datastore.
b. On the Datastore Browser dialog box,
right-click the filename.vmx (virtual
machine) file, and then on the shortcut
menu, click Add to Inventory.
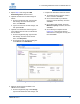
c. On the Add to Inventory Wizard, confirm the
virtual machine name, and then click Next.
d. Review the summary information, and then
click Finish.
The virtual machine is now available to the
VMware host and ready to use.
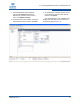
9. Create a universally unique identifier (UUID) as
follows:
a. When you reboot the new virtual machine
for the first time after the migration, the
system prompts you to create a new UUID.
By default, the Keep option is selected.
b. To create a UUID, change the Keep option
to Create.
5
Presenting Destination LUNs on VMware ESX 4.0
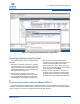
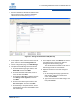
After data migration is complete and the destination LUN is ready, follow these steps. This example
uses the source LUN as the data storage on which virtual machines are installed. The destination LUN has
a larger capacity to show how to expand the data storage after migration.
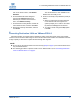
NOTE:
Do not remove the virtual machine from the inventory (Step 8 on page 7) if the virtual machine is the
only accessible machine.
The following procedure is specific to ESX 4.0. For VMware ESX 3.5, see “Presenting Destination
LUNs on VMware ESX 3.5” on page 2.