hp mobile printing for pocket pc user guide
© 2003 Copyright Hewlett-Packard Development Company, L.P. Reproduction, adaptation, or translation without prior written permission is prohibited, except as allowed under the copyright laws. The information contained herein is subject to change without notice. The only warranties for HP products and services are set forth in the express warranty statements accompanying such products and services. Nothing herein should be construed as constituting an additional warranty.
ATTENTION: USE OF THE SOFTWARE IS SUBJECT TO THE SOFTWARE LICENSE TERMS SET FORTH BELOW. USING THE SOFTWARE INDICATES YOUR ACCEPTANCE OF THESE LICENSE TERMS. IF YOU DO NOT ACCEPT THESE LICENSE TERMS, DO NOT INSTALL THE SOFTWARE ON YOUR SYSTEM. SOFTWARE LICENSE TERMS HP Mobile Printing for Pocket PC SOFTWARE License Grant.
No Warranty. Limitation of Liability. TO THE EXTENT ALLOWED BY LOCAL LAW, THE SOFTWARE IS PROVIDED TO YOU “AS IS” WITHOUT WARRANTIES OR CONDITIONS OF ANY KIND, WHETHER ORAL OR WRITTEN, EXPRESS OR IMPLIED. HP SPECIFICALLY DISCLAIMS ANY IMPLIED WARRANTIES OR CONDITIONS OF MERCHANTABILITY, SATISFACTORY QUALITY, NON-INFRINGEMENT AND FITNESS FOR A PARTICULAR PURPOSE.
Contents 1 Introduction About hp mobile printing for Pocket PC . . . . . . . . . . . . . . . . . . . . . . . . . . . . . . . . Direct Printing . . . . . . . . . . . . . . . . . . . . . . . . . . . . . . . . . . . . . . . . . . . . . . . . Features . . . . . . . . . . . . . . . . . . . . . . . . . . . . . . . . . . . . . . . . . . . . . . . . . . . . . . . . Get help with hp mobile printing . . . . . . . . . . . . . . . . . . . . . . . . . . . . . . . . . . . . . .
Configure the printer . . . . . . . . . . . . . . . . . . . . . . . . . . . . . . . . . . . . . . . . . . 61 View Print Manager Information . . . . . . . . . . . . . . . . . . . . . . . . . . . . . . . . . 62 5 Troubleshooting Printing problems . . . . . . . . . . . . . . . . . . . . . . . . . . . . . . . . . . . . . . . . . . . . . . . . 65 Network identification problem . . . . . . . . . . . . . . . . . . . . . . . . . . . . . . . . . . . . . . 72 Appendix Set up Inbox . . . . . . . . . . . . . . . . .
1 Introduction About hp mobile printing for Pocket PC HP Mobile Printing for Pocket PC lets you print e-mail messages, attachments, and files to a variety of printers. It also enables printing from Calendar, Contacts, and Tasks. HP Mobile Printing works with Pocket PCs running Microsoft® Pocket PC 2002 and Pocket PC 2003.
Direct Printing As its name suggests, Direct Printing lets you print directly from a Pocket PC to a printer which can be a Bluetooth, infrared, or network printer (depending on the Pocket PC’s capabilities). Direct Printing offers mobile printing whether you are at home, in the office, on a business trip, or at a conference or a sales meeting. - - DIRECT PRINTING You can do the following: 2 z Create a printer list (optional). z Print e-mail messages, attachments, or files from HP Mobile Printing.
Features The following table shows the features of Direct Printing. Direct Printing Location Mobile printing in or out of the office. Printers Print directly to Bluetooth and infrared printers as well as shared and networked printers. Processing Processing done on the Pocket PC and complex documents may take some time to print. Print quality might not be as good as printing from a desktop computer.
Get help with hp mobile printing If you experience problems, there are a variety of resources available to help you find an answer: z Get help while using HP Mobile Printing. Tap Help on the Start menu to display the help topic for a specific feature. z Go to the HP support Web site for user guides, product information, and FAQs. To access the HP support Web site, open a browser window and go to http://www.hp.com/support/pocketpcprint.
To help ensure any issues are quickly resolved, be prepared to provide the following information: What is the version of the product? (In HP Mobile Printing, tap Tools, and then tap About to find the version.) What is the problem that the product is experiencing? Can you reproduce this problem on a regular basis? What troubleshooting steps have you already taken? In addition, the customer support agent may request log files to be sent to help characterize the issue more readily.
6 Chapter 1 Introduction ENWW
2 Getting started Install hp mobile printing Install HP Mobile Printing from a desktop computer to a Pocket PC through Microsoft ActiveSync. To install hp mobile printing 1 Save the installer program (hpmobileprinting.exe) from http://www.hp.com/go/pocketpcprint_software to a desktop computer. 2 Connect a Pocket PC to the desktop computer by using the ActiveSync cradle. To properly install this software, the Pocket PC must be in the ActiveSync cradle.
After HP Mobile Printing is successfully installed, it appears on the Start menu of the Pocket PC. To open HP Mobile Printing from the Start menu, tap on HP Mobile Printing. To uninstall hp mobile printing Follow these steps if you want to uninstall HP Mobile Printing: 8 1 On the Start menu, tap Settings. 2 In the System tab, tap Remove Programs. 3 Tap Remove after selecting each of the following programs: HP Mobile Printing System HP Mobile Printing Viewer Control...
A quick look at hp mobile printing Open HP Mobile Printing to print e-mail messages or files. The Microsoft Pocket PC operating system does not allow you to print directly from Inbox or File Explorer. When you open HP Mobile Printing for the first time, tap Start using the program to start printing without further setup. In HP Mobile Printing, you will see the same views of e-mail messages and files as in Inbox and File Explorer respectively. Use the buttons on the command bar to switch between these views.
How to print an e-mail message The following example shows how to print an e-mail message to an infrared printer. For more information on printing e-mail messages and files, see Chapter 4, Printing. To print a message and its attachments 1 Open HP Mobile Printing by selecting it from the Start menu. 2 Tap E-mail Printing messages from Inbox. 3 Tap a message to open it.
If the message has any attachments, they are listed below the message. 4 Tap the check boxes to select the message or attachments you want to print. You can only print attachments that have been downloaded to a Pocket PC. The icon next to the attachment shows whether it was downloaded (see What the file icons mean). Tap Print. 5 After you tap Print, the My Printers screen appears. This screen will list any pre-defined printers on your list.
12 Chapter 2 Getting started ENWW
3 Creating a printer list About the printer list Create a list of the printers you frequently use, so that you can select them quickly when you print. The printer list is set up in the Printers tab of the Configuration screen (see Add a printer for instructions).
This list of printers is then available for easy selection when you print from HP Mobile Printing. Configure allows you to add, modify, or remove printers. Print Options allows you to select the number of copies (up to 99), the print quality (draft, normal, or best), and the paper size (letter, A4, or legal).
Paper Type, Quality, and the following print settings are found in the Print Options screen (see Choose print options): Copies (1 to 99) Color Mode (Color or Black & White) “Color” is not available for the LaserJet Monochrome series.
Printer Paper Type: Plain Paper Quality DeskJet 995C Paper Type: Photo Paper Quality Draft, Normal Best Draft, Normal, Best NA LaserJet 1000 series – Best LaserJet 2100 series – – LaserJet 2200 series – – LaserJet 4050 series – – LaserJet 4100 series – – LaserJet 5000 series – – LaserJet 5100 series – – HP Laserjet 3300 MFP – – HP Laserjet 1220 All in One – – OfficeJet D series – – Draft, Normal Best Photosmart 1110/1200/1300 series – – Photosmart 7000 series – –
NOTE. The HP LaserJet printers, HP Deskjet 1120C series printers, Canon printers, and Epson printers do not support printing on photo paper. If a printer model is not listed, select the series that matches the printer. For example, to use a HP Photosmart 7150 printer, select Photosmart 7000 series.
Add a printer Follow the procedures below to add an infrared, network, or shared printer to the printer list. For Bluetooth printers, see Choose a Bluetooth printer. To add a printer, first select the type of printer, then select or search for the specific printer. 18 To choose the type of printer 1 In HP Mobile Printing, tap Tools, and then tap Configuration to display the Configuration screen. 2 Select the Printers tab, and then tap Add.
3 In the Add Printer screen, select the printer type, and then tap Next.
Choose an infrared printer When you select IR printer in the Add Printer screen, HP Mobile Printing automatically attempts to identify the printer and determine the correct printer driver to use when printing. See To detect an infrared printer. If HP Mobile Printing is unable to recognize the printer, you can specify the printer to use by selecting and adding it from a list of available models. See To specify an infrared printer to use manually.
The Specify IR Printer screen appears. The printer’s manufacturer appears in the Mfg drop-down box, while the printer’s model number appears in the Model drop-down box. 3 When you add a printer, you have to give it a name. The name should be unique and easily identifiable. Enter the printer name in the My printer’s name box. When you tap this field, a keyboard will appear. Use the keyboard to enter the required text, and then tap the keyboard icon on the command bar to remove the keyboard from the screen.
Tap the Set as default printer check box if you want to make the current printer your default printer. To print a test page, tap Print Test Page. Tap Finish to add the printer. NOTE. HP Mobile Printing is unable to detect certain infrared printers. If the IR printer cannot be detected, you must use the drop-down boxes to enter the appropriate printer manufacturer and model. For more information, see To specify an infrared printer to use manually. 4 22 The Configuration screen appears.
5 The My Printers screen appears with the added printer. To specify an infrared printer to use manually 1 In the Specify IR Printer screen, use the drop-down boxes to select the printer manufacturer and model. 2 When you add a printer, you have to give it a name. The name should be unique and easily identifiable. Enter the printer name in the My printer’s name box. When you tap this field, a keyboard will appear.
Select the following check boxes as needed: Tap the Enable raw file type check box if you want to send an unprocessed file (such as a postscript or pdf) directly to the printer. Tap the Set as default printer check box if you want to make the current printer your default printer. To print a test page, tap Print Test Page. Tap Finish to add the infrared printer. 3 24 The Configuration screen appears.Tap ok to return to the My Printers screen.
4 ENWW The My Printers screen appears with the added printer.
Choose a network printer After you select Network printer in the Add Printer screen, you will see the Specify Network Printer screen. A network printer requires an IP address or host name. A shared printer requires a printer path. 26 To specify the printer to use 1 In the Add Printer screen, tap Network, and then tap Next. 2 In the Specify Network Printer screen, use the drop-down boxes to select the printer manufacturer and model.
Enter the correct network connection in the Address box. When you tap this field, a keyboard will appear. Use the keyboard to enter the required text, and then tap the keyboard icon on the command bar to remove the keyboard from the screen. The network connection can be one of the following: IP Address (for example, 200.211.15.17) Host Name (for example, NPI2A8931.hp.
28 3 The Configuration screen appears. Tap ok to return to the My Printers screen. 4 The My Printers screen appears with the added printer.
Choose a Bluetooth printer The steps for choosing a Bluetooth printer depend on the Pocket PC you are using: z iPAQ Pocket PCs with integrated Bluetooth capability (for example, the iPAQ Pocket PC H2210 and H5500 series) z Other Bluetooth-enabled Pocket PCs Prepare for Bluetooth printing Before you add or print to a Bluetooth printer, complete the following setup procedures. For iPAQs with integrated Bluetooth capability Make sure that the Bluetooth radio on your iPAQ is turned on.
2 Note the number of the COM port. You will need to specify this port when adding or printing to this Bluetooth printer. Add a Bluetooth printer To add a Bluetooth printer, first choose Bluetooth as the type of printer, then choose or search for the specific Bluetooth printer. 30 To choose the type of Bluetooth printer 1 In HP Mobile Printing, tap Tools, and then tap Configuration to display the Configuration screen. 2 Select the Printers tab, and then tap Add.
4 The Add Bluetooth Printer screen appears. Continue with the instructions below to choose a Bluetooth printer: For iPAQs with integrated Bluetooth For other Bluetooth-enabled Pocket PCs For iPAQs with integrated Bluetooth After you select Bluetooth and tap Next in the Add Printer screen, the Add Bluetooth Printer screen appears. 1 ENWW In the Add Bluetooth Printer screen, select Search for a Bluetooth printer near me.
This is the primary option for iPAQs with integrated Bluetooth (for example, the iPAQ H2210 and H5500 series). When you choose this option, HP Mobile Printing searches for Bluetooth printers within range. It will automatically identify each known Bluetooth printer and determine the correct printer driver to use when printing. Tap Next. NOTE. If HP Mobile Printing is unable to recognize the Bluetooth printer, you can specify the printer to use by selecting it from a list.
In the Specify Bluetooth Printer screen, enter the printer name in the My printer’s name box. When you tap this field, a keyboard will appear. Use the keyboard to enter the required text, and then tap the keyboard icon on the command bar to remove the keyboard from the screen. Select the following check boxes as needed: Tap the Enable raw file type check box if you want to send an unprocessed file (such as a postscript or pdf) directly to the printer.
4 The Configuration screen appears. Tap ok to return to the My Printers screen. 5 The My Printers screen appears with the added printer. For other Bluetooth-enabled Pocket PCs When you select Add a Bluetooth printer, and then tap Next in the Add Bluetooth Printer screen, the Specify Bluetooth Printer screen appears.
To specify the printer to use 1 In the Specify Bluetooth Printer screen, use the drop-down boxes to select the printer manufacturer and model. 2 Select the COM port that was associated with the printer during the setup procedure. The default COM port is 8. To change the Bluetooth COM port setting, go to the Configuration screen and tap the System tab. 3 When you add a printer, you have to give it a name. The name should be unique and easily identifiable.
4 The Configuration screen appears. Tap ok to return to the My Printers screen. 5 The My Printers screen appears with the added printer. Remove a printer To remove a printer 1 36 In HP Mobile Printing, tap Tools, and then tap Configuration to display the Configuration screen.
ENWW 2 Select the Printers tab to display the printer list. 3 Select the printer and tap Remove. 4 Tap Yes in the message box to confirm that you want to remove the printer.
38 Chapter 3 Creating a printer list ENWW
4 Printing E-mail Printing In HP Mobile Printing, tap E-mail Printing a list of messages from Inbox. on the command bar to see To view the message list from another Inbox e-mail service, select it from the service list (located on the left, under the navigation bar). select service and folder to display select the sort order for messages message without attachments e-mail printing NOTE. To view and print attachments, download them to a Pocket PC.
Print a message or attachment To open and print a message 1 Open HP Mobile Printing and tap E-mail Printing command bar. 2 Tap a message to open it. on the If the message has any attachments, they are listed below the message. NOTE. To print attachments, download them to the Pocket PC (see Download an attachment using Inbox). A downloaded attachment has the icon beside it. A non-downloaded attachment has the icon beside it. (see What the file icons mean).
3 Tap the check boxes to select the message or attachments to print, and then tap Print. 4 After you tap Print, the My Printers screen appears. This screen will list any pre-defined printers on your list. To learn how to create a printer list, see Creating a printer list. Select one of the pre-defined printers. If you want to change your print settings before printing, tap Print Options. For more information on the various printing options, see Choose print options. Tap Print to submit the printing job.
To view and print an attachment 1 Open HP Mobile Printing and tap E-mail Printing command bar. on the 2 Tap a message to open it. The attachments are listed below the message. 3 Double-tap an attachment to open it. NOTE. To open attachments, download them to the Pocket PC (see Download an attachment using Inbox). A downloaded attachment has the icon beside it. A non-downloaded attachment has the icon beside it. (see What the file icons mean).
4 To print the attachment, you must first tap ok to close the attachment and return to the previous message screen. Tap the check box next to the attachment, and then tap Print. 5 After you tap Print, the My Printers screen appears. This screen will list any pre-defined printers on your list. To learn how to create a printer list, see Creating a printer list. Select one of the pre-defined printers. If you want to change your print settings before printing, tap Print Options.
To print quickly from the message list 1 Open HP Mobile Printing and tap E-mail Printing command bar. on the 2 Tap and hold a message to display the pop-up menu. 3 To print the message (without attachments) to the last printer used, tap Print. 4 After you tap Print, the My Printers screen appears. This screen will list any pre-defined printers on your list. To learn how to create a printer list, see Creating a printer list. Select one of the pre-defined printers.
Download an attachment using Inbox Follow these steps to download an attachment to the Pocket PC. This procedure is for downloading from an ActiveSync mail server. 1 Open Inbox and open the e-mail message. Attachments are listed below the message. A download icon to the left of an attachment indicates that it has not been downloaded. download icon next to check box 2 To download the attachment, tap the download icon.
After the attachment is downloaded, the download icon will disappear. no download icon When the attachment has been downloaded, you can return to HP Mobile Printing to print it. In HP Mobile Printing, be sure to use the same e-mail service that was used to download the attachment. Example: In Inbox, download attachments using ActiveSync. 46 Chapter 4 Printing In HP Mobile Printing, be sure to go to the same e-mail service.
What the file icons mean In HP Mobile Printing, the icon next to an e-mail attachment or a file identifies the file type, just as the file icons do in File Explorer. In HP Mobile Printing’s e-mail view, the icon also indicates whether the attachment is in the Pocket PC. For example: The icon indicates that the file was not downloaded. The icon indicates that the file was downloaded. If an attachment cannot be printed or opened because the file format is not supported, you will see the icon next to it.
File Printing In HP Mobile Printing, tap File Printing on the command bar to print files located on the Pocket PC or on the network. Supported file formats From HP Mobile Printing, you can open and view files on a Pocket PC (including e-mail attachments that have been downloaded) as well as files from the network. You can view the following types of files: Plain text format (.txt) Pocket Word documents (.psw, .rtf) Notes documents (.pwi) Pocket Excel documents (.pxl) Image formats (.
NOTE. Viewing and printing a complex desktop file on a Pocket PC requires a large amount of its memory and system resources. The recommended minimum memory is 64 MB of system RAM. Before printing a desktop file, close all other applications. If you are printing from a ClearVue viewer, HP Mobile Printing will automatically close the viewer before it prints. PowerPoint slides are printed two to a page, instead of each slide being sized to fill the page. This is due to the memory constraint on the Pocket PC.
3 Select the file to print. To print Microsoft Office documents, you will need WESTTEK’s ClearVue viewers (for details, see Supported file formats). 4 To print the file, tap Print. 5 After you tap Print, the My Printers screen appears. This screen will list any pre-defined printers on your list. To learn how to create a printer list, see Creating a printer list. Select one of the pre-defined printers. If you want to change your print settings before printing, tap Print Options.
Select one of the pre-defined printers. If you want to change your print settings before printing, tap Print Options. For more information on the various printing options, see Choose print options. Tap Print to submit the printing job. Print Word, PowerPoint, Excel, or PDF files You can purchase and install WESTTEK’s ClearVue viewers on a Pocket PC, which will enable you to print Word, PowerPoint, and PDF files from HP Mobile Printing as described earlier.
1 In File Explorer, tap a supported file to open it in a ClearVue viewer. 2 To print the file, tap File, and then tap Print. 3 In the Print Options screen, select a printer from the printer list and tap Print. To view and print attachments in Inbox 1 When viewing a message in Inbox, tap an attachment (of a supported file type) to open it. The attachment is opened in a ClearVue viewer. 52 2 To print the attachment, tap File, and then tap Print.
Print from Calendar, Contacts, and Tasks In Calendar, Contacts, and Tasks, the Print function is provided in the pop-up menu or Tools menu. The Print function prints details of the selected appointments, contacts, or tasks. To print details of selected items 1 Open Calendar, Contacts, or Tasks. 2 Select the item to print. In some views you may be able to select more than one item. In Calendar and Tasks, you can make a selection in the Print screen (see step 4).
When you have made your selection, tap Print. 5 After you tap Print, the My Printers screen appears. This screen will list any pre-defined printers on your list. To learn how to create a printer list, see Creating a printer list. Select one of the pre-defined printers. If you want to change your print settings before printing, tap Print Options. For more information on the various printing options, see Choose print options. Tap Print to submit the printing job.
Choose print options The Print Options screen allows you to change various print settings, such as the number of copies, paper size, and quality. The color settings option shown below is not available on all printers. select number of copies select paper quality select paper size select color The Print Options screen is also the screen that appears whenever you print from other programs (Calendar, Contacts, and Tasks, as well as ClearVue viewers).
View the status of current jobs You can view jobs that are currently in the process of printing, and either cancel the jobs, get details of the jobs, or, when necessary, the details of printing errors. To view the status of current jobs 1 In HP Mobile Printing, tap Tools, and then tap Job Status to enter the Print Manager. If the Current Print Jobs screen is not the current screen, select the Tools tab, and then tap Current Print Jobs.
The Details button becomes enabled once you select the job (for example, On Hold - \Temp\HPPrintHistory.Backup). If you tap the name of the printer (for example, My IR Printer) only the Continue and Cancel buttons become enabled. The details of the selected job will then appear. To cancel a specific job, select the job, and then tap Cancel (see Cancel printing). If there is an error during printing, a Job Stopped screen will appear.
Clear past job entries If you have printed many documents, you can clear some of the past job entries from the Past Print Jobs screen. You can clear job entries that have the “Done,” “Canceled,” or “Error” status. To clear past job entries 1 In HP Mobile Printing, tap Tools, and then tap Job Status to enter the Print Manager. If the Past Print Jobs screen is not the current screen, select the Tools tab, and then tap Past Print Jobs. 2 To clear the past job entries, tap Clear List.
To cancel printing 1 In HP Mobile Printing, tap Tools, and then tap Job Status to enter the Print Manager. If the Current Print Jobs screen is not the current screen, select the Tools tab, and then tap Current Print Jobs. 2 Select the job entry or entries that you want to clear, and then tap Cancel. In the example above, the “On Hold” status line for “Test Printer” is selected, and the Cancel button is enabled.
To change logging levels 1 In HP Mobile Printing, tap Tools, and then tap Job Status to enter the Print Manager. If the Logging Levels screen is not the current screen, select the Tools tab, and then tap Logging. 2 Select the appropriate level. The log files are located in My Device/ Temp. NOTE. For a new logging level to take effect, you must first close and then restart the application. For information on how to close an open application, see To close open applications.
To choose content transformation preferences 1 In HP Mobile Printing, tap Tools, and then tap Job Status to enter the Print Manager. If the Content Transformation Preferences screen is not the current screen, select the Tools tab, and then tap Content Transformation Prefs. 2 In the scroll box, select the file type that you want to print. 3 In the list box, select the Content Transformation (CT) provider that will handle the selected file type.
The Configuration screen appears. 4 In the Configuration screen, select the Printers tab, and then tap to select the task that you want to perform with the printers. To add a printer to the printer list, tap Add. To modify a printer, tap Modify. To remove a printer from the printer list, tap Remove. View Print Manager Information You can access general information regarding the Print Manager (for example, the version number and copyright information) from the Print Manager Screen.
To view Print Manager information From a Print Manager screen (such as Current Print Jobs), tap the Info tab, and then tap About.
64 Chapter 4 Printing ENWW
5 Troubleshooting Printing problems Unable to find Print buttons when trying to print e-mail messages or files You must open HP Mobile Printing to print e-mail messages or files. Make sure you are not looking for the Print buttons in Inbox or File Explorer as you cannot print directly from those programs. You can purchase and install ClearVue viewers which will enable you to open files in Inbox or File Explorer (supported file formats only) and then print them.
HP Mobile Printing indicates that an attachment is not downloaded, even though I’ve already downloaded it in Inbox In HP Mobile Printing, be sure to go to the same e-mail service that was used to download the attachment in Inbox. Example: In Inbox, download attachments using ActiveSync. In HP Mobile Printing, be sure to go to the same e-mail service. Unable to open network folder in HP Mobile Printing Before you can open the network folder, you must use the File Explorer to download the associated files.
If the connection is interrupted, you have to reprint the document. NOTE. Some older infrared devices such as HP Photosmart 1000 series printers use an infrared protocol that is not compatible with HP Mobile Printing. Unable to print to a Bluetooth printer Check the following: z The Bluetooth printer is switched on and not currently printing. z The Bluetooth radio on the Pocket PC is turned on. z The devices are within the recommended 10-meter range.
c In the pop-up menu, tap Disconnect. This allows HP Mobile Printing to establish its own COM port connection to the Bluetooth printer. d Return to HP Mobile Printing to print. 2 In HP Mobile Printing for Pocket PC, manually add the Bluetooth printer, and then set the COM port to COM8. a Tap Start, and then tap HP Mobile Printing. b Tap Tools, and then tap Configuration. Select the Printers tab, and then tap Add. c Select Bluetooth, and then tap Next. d Select Add a Bluetooth printer, and then tap Next.
You’ve initiated a search for nearby Bluetooth printers on an iPAQ 5450/55, but the resulting list is empty. There may be a faulty connection between the Bluetooth printer and Bluetooth Manager that is preventing HP Mobile Printing from connecting to, or searching for, that printer. To correct the problem, do one of the following two options: 1 Remove the connection between the printer and the COM port.
NOTE. HP iPAQ printers typically use the COM8 port for Bluetooth connections. Other manufacturers may use a different COM port for Bluetooth printing. See the manufacturer’s printer documentation for more details. f Enter a unique and easily identifiable printer name in the My printer’s name box. Use the keyboard to enter the required text, on the command bar to and then tap the keyboard icon remove the keyboard from the screen.
Handwritten notes from Pocket Notes cannot be printed out HP Mobile Printing does not support this function. When viewing or printing a Word, PowerPoint, or Excel file, the document does not appear as expected See ClearVue product limitations. PowerPoint slides are printed two to a page, instead of each slide being sized to fill the page. This is due to the memory constraint on the Pocket PC.
In the Running Programs tab, tap the application to close, and then tap Stop. You can also choose to Stop All Programs. After closing the programs, try printing again. If you still see the same error message, reset the Pocket PC. Network identification problem You receive a message that states that network access is denied The name of the PC as indicated in the Settings/About screen must have a unique network resource name.
Appendix Set up Inbox In Inbox, an e-mail service has to be set up for each method you use to access company e-mail accounts. You can obtain the required information from the IT administrator: z e-mail user name and password z incoming mail server name z outgoing mail server name z Windows NT domain name NOTE. For configuring the Inbox, specify the required exchange server domain, user name, and alias information.
74 3 Wait for the configuration of the e-mail settings to complete. When the Status box displays Completed, tap Next. 4 Use the keyboard to enter the user information, and then tap Next.
ENWW 5 Use the drop-down box to select the service type (IMAP4 or POP3). Use the keyboard to enter a unique name for the e-mail service, and then tap Next. 6 In the final Setup screen, use the keyboard to enter the server information, and then tap Options.
7 In the Advanced screen, make sure you select Default Work Settings in the Connection drop-down box. Then tap Back to return to the previous screen. 8 Tap Finish to complete the setup. Ensure that the setup was successful by using the e-mail service to send and receive messages.
To send and receive messages 1 Tap Services, and make sure that the e-mail service you want to use is selected (it should have a bullet next to it). 2 Tap Connect. Inbox should be able to connect to the mail server and retrieve messages. If you are unable to send and receive messages, contact the IT administrator for help.
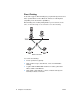
ClearVue Suite compatibility Due to changing technology, backward compatibility between certain versions of HP Mobile Printing and WESTTEK’s ClearVue Suite could not be preserved. The following table indicates version compatibility between the products. To determine compatibility, match your version of HP Mobile Printing with the version of ClearVue Suite. Version of HP Mobile Printing Version of ClearVue Suite Compatibility v1.0.0.7 (PPC 2002) v2.12 Yes __ v2.2 No __ v2.3 No v1.0.0.
ClearVue product limitations WESTTEK’s ClearVue Presentation, ClearVue Worksheet, and ClearVue Document are viewers for the Windows CE-based Pocket PC and do not support all of the features included in the desktop versions of Microsoft PowerPoint, Excel, and Word respectively. Restrictions in functionality are due in large part to the size and operating characteristics of the underlying Pocket PC platform. The following sections list some notable limitations.
ClearVue Document z ClearVue Document does not support files created with versions of Microsoft Word prior to Office 97. z ClearVue Document has only limited support for AutoShapes and does not support images embedded inside of an AutoShape. z Pocket PC does not provide the same number and type of fonts that are available on a desktop PC. While WESTTEK’s ClearVue Document will show a close approximation of the intended textual and page layout, some differences may occur.
© 2003 Hewlett-Packard Development Company, L.P.