
HP MFP Digital Sending Software (DSS) 5.0 - Security Features

14
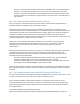
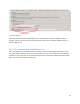
2. Follow these steps to import the certificate on the DSS server:
. Navigate to the DSS Server computer by using the MMC snap-in, and then browse to the
Trusted Root Certification Authorities folder.
a. Right-click the Trusted Root Certification Authorities folder, point to All Tasks, and
then click Import.
b. Browse, and then select the certificate (.cer file) that you generated in step 1. Select
the defaults to complete the remaining part of the wizard.
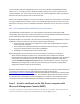
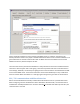
Step 3 - Configure DSS to use SSL / TLS when communicating
with SQL SERVER
This step is done on the Security tab of the DSS Configuration Utility. Checking the checkbox shown in
the screenshot below will enable the SSL / TLS communication. Remember, for this communication
channel server certificate validation is always on.
When the Encrypt SQL connection checkbox is checked DSS will:
1. Test the connection
2. If the test from step 1 fails the checkbox will be unchecked
3. If the test from step 1 passes, when the Apply button is pressed to save current settings, DSS will
restart the CU and service
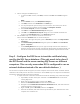
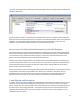
SSL/TLS communications with LDAP servers
DSS may communicate with LDAP servers for several reasons. These include authentication if LDAP
authentication is the chosen method, and for addressing if the system is configured to do LDAP address
replication.
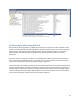
In the DSS Configuration Utility, when a feature is enabled that uses an LDAP server, the use of the SSL /
TLS protocols is enabled via a checkbox in the UI. Below is a screenshot of the UI to configure DSS for
LDAP address replication.