
HP MFP Digital Sending Software (DSS) 5.0 - Security Features
13
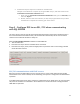
1. How to configure the MMC Snap-in
a. To open the MMC console, click Start, and then click Run. In the Run dialog box
type:
MMC
b. On the Console menu, click Add/Remove Snap-in....
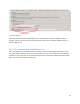
c. Click Add, and then click Certificates. Click Add again.
d. You are prompted to open the snap-in for the current user account, the service
account, or for the computer account. Select the Computer Account.
e. Select Local computer, and then click Finish.
f. Click Close in the Add Standalone Snap-in dialog box.
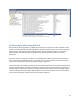
g. Click OK in the Add/Remove Snap-in dialog box. Your installed certificates are
located in the Certificates folder in the Personal container.
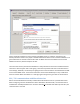
2. Use the MMC snap-in to install the certificate on the server:
. Click to select the Personal folder in the left-hand pane.
a. Right-click in the right-hand pane, point to All Tasks, and then click Request New
Certificate....
b. The Certificate Request Wizard dialog box opens. Click Next. Select Certificate
type is "computer".
c. In the Friendly Name text box you can type a friendly name for the certificate or
leave the text box blank, and then complete the wizard. After the wizard finishes, you
will see the certificate in the folder with the fully qualified computer domain name.
Step 2 - Configure the DSS Server to trust the certificate being
used by the SQL Server database. (This only needs to be done if
the DSS Server and the server running SQL Server are different
computers. This can only occur when DSS is configured to use an
external database instead of its own default database. )
For the client to request the SSL encryption, the client computer must trust the server certificate and the
certificate must already exist on the server. You have to use the MMC snap-in to export the Trusted Root
Certification Authority used by the server certificate:
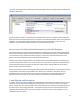
1. To export the server certificate's Trusted Root Certificate Authority (CA), follow these steps:
a. Open MMC, and then locate your certificate in the Personal folder on the server
running SQL Server.
b. Right-click the certificate name, and then click Open.
c. Review the Certification Path tab. Note the top most item.
d. Navigate to the Trusted Root Certification Authorities folder, and then locate the
Certificate Authority noted in step c..
e. Right-click CA, point to All Tasks, and then click Export.
f. Select all the defaults, and then save the exported file to your disk where the client
computer can access the file.