
HP Storage Provisioning Manager (SPM) Version 1.3 User Guide
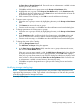
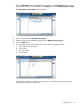

1. From the Global menu, select Catalog→Define Tags. (Alternatively, in the Navigation tree click
Catalog, then click the Actions Define Tags button.
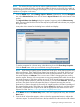
The Define Tags dialog box appears.
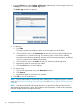
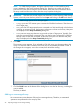
2. To add tags:
a. Click Add.
The newly created entry displays in blue on the next empty line of the table.
b. Click on the blue entry in the Namespace column, then enter the preferred Namespace.
A Namespace is a container for tags. The same tag value can be used in different
Namespaces and functions separately. All users can use the same Namespace, or different
users can create and use different Namespaces.
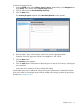
c. Click on the blue entry in the Value column, then enter the preferred tag name.
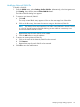
d. Repeat these steps for each tag to be added.
e. Click the OK button to save the addition.
3. To remove a tag:
a. Click on the appropriate entry in the Namespace column.
b. Click Remove.
c. Repeat these steps for each tag to be removed.
4. Click OK to save the modifications.
NOTE: This procedure adds or removes tags at the catalog level. To change the tags for a specific
entity, see Viewing and modifying array tags (Tags tab) and Modifying tags on the volume service
(Tags tab).
NOTE: Tags that are defined in HP Insight Dynamics are provided to SPM and placed in the
appropriate tag Namespace in SPM. Tags created in this Namespace in SPM are also provided
to the HP Insight Dynamics Storage Pool screen.
22 Configuring the storage catalog