
HP Matrix 7.2 KVM Private Cloud Getting Started Guide

Your identification has been saved in /c/Users/you/.ssh/id_rsa.
# Your public key has been saved in /c/Users/you/.ssh/id_rsa.pub.
# The key fingerprint is:
# 01:0f:f4:3b:ca:85:d6:17:a1:7d:f0:68:9d:f0:a2:db your_email@youremail.com
4. Enter the following command to copy the key to your clipboard. The clip command does not
add newlines or whitespace to the clipboard.
clip < ~/.ssh/id_rsa.pub
5. Paste the contents of your clipboard into the Public key for keypair field.
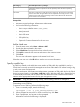
Add an image
Use this procedure to add an image that can be used to create an instance.
The image to upload must be contained in a single file. You cannot upload a multipart disk image
(for example, a kernel image and a RAM disk image.)
1. From the main menu, select Images.
2. Select Actions→Add.
3. Select one of the following:
• Enter file URL. Enter the URL (beginning with HTTP:) of the image to upload from a file
server accessible to the host management subnet, for example,
http://fileserver.com:port/dir1/imagename.
NOTE: HP recommends adding an image by specifying a URL from a file server to
avoid browser upload file size limitations. Select Enter file URL if the image file is more
than 2 GB and your browser is Microsoft Internet Explorer, or the image file is more than
4 GB and your browser is Mozilla Firefox.
• Select local file to display a file selection dialog. Select a single file that contains the
image, or drag and drop the file from the selection dialog onto the shaded portion of the
screen.
4. Enter the data requested on the screen.
5. Click Add at the bottom right of the screen to complete the action.
The screen closes and the new images appear on the overview list of Images.
Click Cancel to exit the action without uploading an image.
6. Verify that the image was successfully added on the Images overview screen. If the size of
the image is 0.0 GB, the image is invalid or is not accessible to the Host management subnet.
See Troubleshooting images (page 39) for more information.
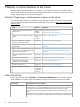
Adding multiple images in one operation
1. From the main menu, select Images.
2. Select Actions→Add.
3. Enter the data requested on the screen.
4. Click Add + to complete this image and reset the form for entering another new image.
5. Repeat steps 3 and 4 until you are finished adding multiple new images, then click Cancel to
dismiss the Add screen.
The screen closes and the new image appears on the overview list of Images.
If the Add image operation is unsuccessful, see “Troubleshooting images” (page 39).
Connect to Matrix OE
NOTE: Use Matrix Operating Environment to perform the remaining steps in this chapter.
28 Deploy a virtual machine to the cloud