
HP Matrix Operating Environment 7.2 Installation and Configuration Guide for Provisioning with Virtual Resources


Configuring SNMP and UAC
For Windows 2008 and 2012:
1. Configure SNMP community names and traps.
a. Select Start Menu→Administrative Tools→Services.
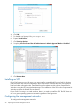
b. Right-click SNMP Service and then select Properties.
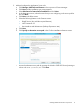
c. Select the Security tab.
d. In the Accepted community names section, click Add.
i. Select READ ONLY permission level for the community string in the Community Rights
menu.
ii. In the Community Name box, enter public or a specified case-sensitive community
name.
iii. Click Add.
e. In the Accepted community names section, click Add.
i. Select READ WRITE permission level for the community string in the Community Rights
menu.
ii. In the Community Name box, enter private or a specified case-sensitive community
name.
iii. Click Add.
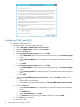
f. Under the Accept SNMP packets from these hosts, verify that localhost is listed. If it is
missing:
i. Enter localhost and click Add.
ii. Confirm that localhost has been added under Accept SNMP packets from these hosts.
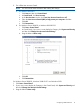
g. Select the Traps tab.
i. In the Community Name box, enter public or a specific case-sensitive community
name.
ii. Click Add to list.
iii. Under Trap destinations, click Add….
iv. For Hostname enter the primary IP address of the CMS, and click Add.
h. Click OK to exit and apply.
For Windows 2008:
18 Preparing the Central Management Server