
8.5 HP StorageWorks P4000 VSA Installation and Configuration Guide (TA688-96017, September 2010)


11. Select Memory and reserve the appropriate amount of physical memory for the disk capacity,
as shown in Table 2 on page 12.
Table 2 Reserve physical memory for VSA for ESX disks
Requires At Least This Much MemoryTotal Capacity of All Installed Disks
1 GB< 500 GB to 4.5 TB
2 GB4.5 TB to 9 TB
3 GB9 TB to 10 TB
1. Click OK to close the Virtual Machine Properties window.
2. Select the ESX Server in the inventory panel.
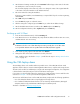
3. Click the Resource Allocation tab.
4. Verify the CPU and Memory reservations you just set.
Configuring the VSA for use with the HP StorageWorks SAN Solution
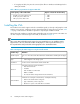
1. In the inventory panel, select the new VSA and power it on.
2. Select the Console tab and wait for the VSA to boot.
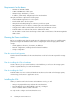
3. After the VSA boots up, log in and use the Configuration Interface to configure an IP address
and host name for the VSA.
Figure 1 Logging in to the Configuration Interface
.
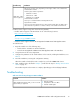
Using the Configuration Interface
Use the Configuration Interface to set the IP address and host name on a VSA.
1. Type Start and press the Enter key to log in to the Configuration Interface.
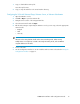
2. On the Configuration Interface main menu, tab to Network TCP/IP Settings and press the Enter
key.
3. On the Available Network Devices window, tab to the network interface and press the Enter key.
Installing the VSA for ESX Server12