HP Network Sign Manager User Guide
© 2010, 2014 Hewlett-Packard Development Company, L.P. The information contained herein is subject to change without notice. The only warranties for HP products and services are set forth in the express warranty statements accompanying such products and services. Nothing herein should be construed as constituting an additional warranty. HP shall not be liable for technical or editorial errors or omissions contained herein. This document contains proprietary information that is protected by copyright.
Table of contents Installing HP Network Sign Manager .................................................................................................................. 1 Connecting the Signage Display ............................................................................................................................ 1 System requirements ............................................................................................................................................ 1 Features ............
IP Configuration Remote Control ................................................................................... 14 Status .............................................................................................................................. 14 Diagnosis ......................................................................................................................... 15 Controlling a display ...................................................................................................
On/Off Time Schedule Info ............................................................................................. 24 Saving and loading display configuration ........................................................................................ 24 Saving display configuration .......................................................................................... 24 Loading display configuration ........................................................................................ 25 Tile Mode .
vi
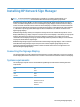
Installing HP Network Sign Manager NOTE: To determine if Network Sign Manager is available for your digital signage display, go to www.hp.com/go/digitalsignage and consult the data sheet and/or user guide for your product. HP Network Sign Manager (NSM) is a software utility included with HP digital signage displays that allows remote, centralized management and control of HP digital signage displays.
Features ● Integrated Control of LAN and Serial Communications—Easily manages the display connected by local network or serial (RS232–C) communications. ● Local Area Network (LAN) Control—Efficiently controls the displays at remote sites through LAN connections. ● Automatic Search for displays on the Same Network—Automatically searches, adds, and manages displays connected to the same network as HP Network Sign Manager.
Setting a static IP address for a media player/computer NOTE: Use these steps when the media player/computer is connected directly to a display via a peer to peer LAN connection. 1. From the computer Control Panel, under Network and Internet, click on View network status and tasks, then click on Local Area Connection. 2. Click Properties, highlight Internet Protocol Version 4(TCP/IPv4), click on Properties, click on the button for Use the following IP address: and then add an IP address and Subnet mask.
IN IN IN OUT OUT OUT NOTE: The number of displays that can be connected by daisy chain to one media player/computer might vary depending on the signal status and cable loss. If the signal status is good, and there is no cable loss, it is possible to connect up to twenty-five displays in a daisy chain from one media player/ computer. HP Network Sign Manager installation Install HP Network Sign Manager on the media player/computer to be directly connected with the display or to the network.
Home screen NOTE: Screen image content varies based on model. A B C D A Toolbar Provides functions commonly used in HP Network Sign Manager such as networked display search/connection and communication configuration. B Monitor Register Window Displays and manages the list of network connected displays found in Search, manages grouping displays, and selects the individual display in the list to which commands are issued.
Toolbar Provides functions commonly used in HP Network Sign Manager. Search is used to find display(s) that are connected to the network and add them in the Monitor Register Window pane. The Search icon is enabled only when the communication configuration of HP Network Sign Manager is set to Network (Ethernet). Setting is used to configure the communication method of HP Network Sign Manager. You can choose either Network (Ethernet) or Serial connection.
Log-in The Log-in dialog appears when HP Network Sign Manager starts. You must log in to use HP Network Sign Manager. Enter your ID and password in the Log-in dialog, and then click OK. Then, you are returned to the main window of HP Network Sign Manager. NOTE: The ID and password are case-sensitive. The default ID and password for HP Network Sign Manager are “administrator” and “0000” respectively. You can change the password.
Display registration HP Network Sign Manager allows you to add and manage multiple displays with both Network (Ethernet) and Serial communications. Registering a networked display The following describes how to add a display with Network (Ethernet) communication. 1. Click Search 2. Specify a Search Method in the Signage Monitor Search dialog. on the toolbar. The Signage Monitor Search dialog appears.
A display connected via serial communication must have an ID assigned. HP Network Sign Manager uses this ID to communicate with the display connected to the computer using the serial cable. To control a display, select an ID of the display that you wish to control in the Monitor Register Window pane. NOTE: If you select Monitor 0 in the Monitor Register Window pane, you can control all displays regardless of the IDs.
3. Enter a group name in the Make Group dialog, and then click Apply. A new group is created under Group in the Monitor Register Window pane. Adding a display to group You can add displays to the group you want and manage them by group. A group may have only one type of display within the group. See Commands and Settings Appendix for details of which displays may be grouped together. Commands will be sent to all the displays in a group simultaneously.
NOTE: Alternatively, you can simply drag and drop a display to the group you want in the Monitor Register Window pane. Viewing group information If you select a group in the Monitor Register Window pane, you can see a summary of all displays included in the group. NOTE: Screen image content varies based on model. A B C D E F G H I A Status Displays the network connection status of the displays included in the selected group.
Deleting a group You can delete a display and group added in the Monitor Register Window pane. The following sections describe how to delete a display and group. Deleting a group 1. Right-click a group to delete. The Delete button appears. 2. Click Remove Group from the shortcut menu. The selected group is now deleted. Deleting a display from a group 1. Right-click a display to delete from a group. The shortcut menu appears. 2. Click Delete from the shortcut menu.
Display configuration HP Network Sign Manager can remotely control the connected displays and change their settings. Viewing information You can see details of the display configuration in the Information tab. Display The Display section shows the basic information on the selected display. Item Description Model Name Model of display.
IP Configuration VOE The IP Configuration VOE section shows the network information of VOE for the selected display. Item Description IP Configuration Method IP configuration (DHCP/Static) Network properties Network properties NOTE: IP Configuration VOE is only available on select models. IP Configuration Remote Control The IP Configuration Remote Control section shows the network information for the selected display.
Diagnosis The Diagnosis section shows display activities and failures. Item Description Backlight Lamp Status (only available on select models) Power Power status Ambient Light Sensor Adjust the frequency of the ambient light (only available on select models) Elapsed Operating Time Total elapsed power on time of display (hours) Temperature (inside) Temperature inside the display Controlling a display The Control tab allows you to control the selected display.
Power You can turn the display on or off with a mouse-click under Power. The color of the button changes depending on the display status. Item Description Blue When the display is turned on, or the display is in energy-saving mode. Red When the display is turned off NOTE: When the display is turned off or in energy-saving mode, you can use Power on, Volume control, Signal check, and Lamp check functions only. Select Input Use Select Input to select an input type supported in the display.
OSD Enable/Disable OSD Enable/Disable is used to turn on or off the OSD (on-screen display) of the display. Set to OSD Disable to remove the appearance of the OSD from the screen. NOTE: You cannot configure the screen settings with a remote control or key operations of the display when OSD Disable is set to Off. Configuring audio/video settings You can change the audio and video settings of the selected display in the A/V tab. NOTE: Screen image content varies based on model.
Contrast Contrast is used to adjust the position of the slider between 0 and 100 to set the contrast of the screen. NOTE: Changing this setting will invalidate the color calibration of select models. Brightness Brightness is used to adjust the position of the slider between 0 and 100 to set the brightness of the screen. NOTE: Changing this setting will invalidate the color calibration of select models.
Sound Mode Sound Mode is used to set the sound mode of the display. Auto Volume Auto Volume is used to turn on/off the auto volume adjustment function. Setting Auto Volume to On will automatically adjust and optimize the display volume. Balance Balance is used to control the left and right speaker balance by adjusting the position of the slider between -50 (left) and 50 (right). Speaker Speaker is used to turn on or off the display speaker.
Setting screen options The Option tab allows you to change the screen settings of the selected display. NOTE: Screen image content varies based on model. NOTE: Screen setting options might vary depending on the display model. Aspect Ratio Aspect Ratio is used to set the aspect ratio of the screen. ISM Method ISM Method is used to change the Image Sticking Minimization (ISM) method for the display.
Image Sticking Method Description Inversion Inverts the current screen color to remove the ghost image. Dot Wash Imposes black dots on the image, moving them every 5 seconds (only available on select models). Power indicator LED Power Indicator LED is used to enable or disable the power indicator of the display. DPM Select DPM Select is used to change the display DPM (Dynamic Power Management) setting.
Sleep Timer Sleep Timer is used to set the timer to go to the sleep mode. Once the specified time passes, the display turns off automatically. Auto Off Auto Off is used to enable or disable the auto power off function. Setting Auto Off to On will turn off the display if no image signal is detected for 10 minutes. Power On Delay Power On Delay is used to adjust the slider between 0 and 100 to set the delay time before turning the display on.
Scheduling The Schedule tab allows you to schedule the power on and off of the display. NOTE: Screen image content varies based on model. Clock Clock is used to set the current time of the display. ● Select hour/minute/day, and then click Set to complete the time setting. ● Click Set by PC Time to synchronize the clock of the display to the clock of the media player/computer that is installed with HP Network Sign Manager.
2. Set both On Time (time to turn the display on) and Off Time (time to turn the display off). You can specify On Time and Off Time separately by selecting each check box as shown below. 3. Set an input setting to use when the display is turned on – VOE (only available on select models), RGB (PC), DisplayPort, or HDMI/DVI (only available on select models). NOTE: 4. Selecting No change will keep the last input setting.
Loading display configuration You can import (load) the saved settings to restore the display settings easily. The following describes how to import the saved display settings. 1. Right-click a display for which the settings are to be imported and restored. 2. Click Load Configuration from the shortcut menu. The Open dialog appears. 3. Select the display settings file to import, and then click Open.
7. After you have selected the input source and verified that the Group matrix values are correct, click Next to verify that the Tile ID is assigned correctly. 8. Assign Tile ID to each display in the matrix by setting the numbers in the display icon to the correct Tile ID in the matrix. This screen will change the Tile ID setting in each display to correspond to the ID set in each icon.
Modifying a Tile Mode The following describes how to modify the previous Tile Mode. 1. Select the Tile tab. The Tile Mode Wizard appears. To modify a previous Tile Mode, select Adjust Tile Mode. 2. The Tile Mode Summary dialog appears. Modify the Tile Mode as necessary. Tile Mode Settings 16.9mm to 20.3mm Bezel Models Micro Bezel Models Tile Mode: Choose the matrix dimension (HxW); OFF, 1x2, 1x3, 1x4, 1x5, 2x1, 2x2, 2x3, 2x4, 2x5, 3x1, 3x2, 3x3, 3x4, 3x5, etc.
A B C A B C File List Play List Repeat Set Lists the media files in the USB device connected to the display. ● Select All—Selects all media files in File List. ● Clear All—Deselects all media files in File List. ● Add—Adds the selected file to Play List. Lists the media files to play on the display. ● Up—Moves up the selected file in Play List. ● Down—Moves down the selected file in Play List. ● Delete—Removes the selected file from Play List.
Repetition option Description Fri Plays the Play List for the specified time period on Friday. Sat Plays the Play List for the specified time period on Saturday. ● Apply—Saves the playback schedule and the Play List. ● Cancel—Deletes the current playback schedule set for the display. ● Option—Sets the playback schedule option ● Back—Moves back to the USB function selection view.
7. Set the start and end times between 00:00 and 23:59. 8. Click Option to adjust the slide time interval and the aspect ratio. 9. Select one of the options in the Slide Time drop-down list. You can set the slide time to 5, 10, or 30 seconds, and 1, 5, 10, 30, or 60 minutes. 10. Use the Aspect drop-down list to adjust the aspect ratio of photos and movies. Select Original to keep the original aspect ratio; select Full to view in full screen mode.
Ethernet Network To use Network (Ethernet) communication: 1. Under Communication Select, select Network. 2. Click OK to complete. RS-232-C Serial Communication To use RS-232-C serial communication: 1. Under Communication Select, select Serial. Adjust the serial communication settings to fit your environment. 2.
Refresh Refresh is used to refresh the information in the selected Control Tab. For example, select the Information tab, and then click Refresh. The information for the selected display or display group is updated. NOTE: Screen image content varies based on model. Similarly, to view the current display settings, select a display, select the A/V tab, and then click Refresh Message Message is used to display a message you want on the selected display.
2. On the toolbar, click Message. The Message Setting dialog appears. NOTE: If a display or display group has not been selected, the Message Setting dialog does not appear. The message will remain on the display until one of the following actions happens locally at the display. Any action button on the IR Remote Control is pressed (Example: BACK, TILE, EXIT, INPUT, ARC/ MARK, PSM, BRIGHTNESS, MENU, AUTO, USB, MUTE.
1. On the toolbar, select Alarm. The Alarm dialog appears. 2. To send an alert email automatically to the administrator, set the following fields: Item Description Subject Enter the subject. To Enter the email address of the administrator. From Enter the email address of the sender. SMTP Server Enter the host name or IP address of the SMTP server to use. NOTE: HP Network Sign Manager cannot use the Alert Mail function if the specified SMTP server requests the ID and password of the email sender.
3. The fields under New ID & Password are enabled. Enter a new administrator ID and Password that you want to use. Enter the same password again in the Verify field. NOTE: The default ID and Password of HP Network Sign Manager are “administrator” and “0000” respectively. 4. Click Change to apply changes. You should use the changed ID and password the next time that you log into HP Network Sign Manager. Help Help displays information about the HP Network Sign Manager program.