
HP SureStore HD Server 4000 User's Guide - 5967-9979


2
-
8 Installation
Connecting and Starting Up
Startup Steps
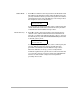
1. While the power is off, attach your network cable to the RJ-45
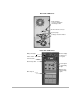
connector on the rear of the server. (See the rear view
illustrated on page 2-7.)
Note ❏
If you have attached an external tape drive, now install its
power cord and switch on its power.
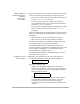
2. Attach the two power cords to the rear of the server and to power
outlets (preferably to separate power circuits). (See the rear view
illustrated on page 2-7.)
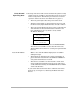
3. On the front of the server, switch on power. (See the front view
illustrated on page 2-7.)
4. Verify that:
• The main power light (LED) above the power switch is on
and the power display (2-character LED) displays
HP
.
• Drive power and drive activity lights (LEDs) blink to
indicate self-tests. The drive power light on each disk drive
module stays green.
• The control panel (LCD) displays self-testing and loading
messages.
If you see any of the following exceptions to the verification
checks listed above, refer to chapter 11, “Resolving Problems
with Your Server”:
• Lights described above fail to go on.
• Power display shows
LF
or
PF
or
FF
.
• Control panel displays
FAIL
or
FAULT
anywhere in the text.
• Control panel display remains unchanged for more than
ten seconds.
Note ❏
When you start up the server, its behavior depends on whether
you are installing it for the first time or have already installed
it before. The first time, it will behave as described in step 5
below; proceed with this procedure. If the behavior is different,
it has probably been started before; go to “Starting Up the
Server” on page 6-1 instead.