
A.05.70 HP Insight Remote Support Advanced Operations Guide (October 2011, 5900-1727)
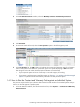

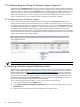

2. In the All Scheduled Tasks window, select the Monthly Contract and Warranty Collection.
3. Click Run Now.
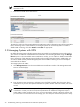
4. To review the results of the task, select the All Systems option in the left navigation panel.
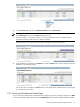
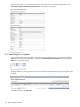
5. In the All Systems list, the CW column will indicate the Contract and Warranty status for all systems.
Click on the symbol to see details for a particular system. For systems displaying a CW status other
than the green circle with white checkmark (which indicates a normal status):
• If you expect the system to be out of warranty or not under support, do nothing.
• If you expect a valid warranty or SLA follow steps 4-7 of Section 1.2: “Adding Individual Managed
Systems” to update Contract and Warranty information for that particular system.
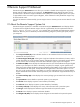
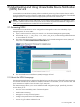
1.4.1 How to Run the Contract and Warranty Task against an Individual System
This process may be useful if your collection data returned a small number of non-entitled systems and you
want to run the task against a specific system.
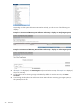
1. In the HP SIM User Interface, from the horizontal tool bar, select Options → Contract and Warranty
Data Collection.
1.4 Checking Contract and Warranty Support Levels for Added Managed Systems 21