
HP Insight Management Agents 8.40 Installation Guide


Installation instructions for Microsoft Windows 6
7. Click Install.
8. After the installation is complete, click Close.
To install the SNMP service in Windows Server
®
2003:
1. Select Start>Settings>Control Panel.
2. Click Add/Remove Programs>Add/Remove Windows Components.
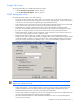
3. From the Windows Components Wizard window, select Management and Monitoring Tools, and then click
Next.
4. From the Management and Monitoring Tools window, select Simple Network Management Protocol.
5. Click OK. The Component Wizard window appears.
6. Click OK to start the installation
For more information, see the Windows Server
®
2003 or Windows Server
®
2008 documentation.
Configuring SNMP for Windows Server
®
2003 and Windows Server
®
2008
To configure the SNMP:
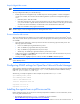
1. Select Start>Programs>Administrative Tools>Computer Management.
2. Select Services and Applications>Services.
3. Double-click Service Name, and then select SNMP Service Properties.
4. Click the Security tab, and then click Add to add the community string.
For the Insight Agents to function correctly, at least one community string needs to have READ/WRITE access.
The community string can be a large, non-unique string that can be forgotten after inputted (that is, it is not used
except for inter-agent communications).
5. Select a name for the string and access rights.
6. Click Apply>OK.
7. Click the Security tab and make sure under Accept SNMP Packets from these Hosts includes loopback
(127.0.0.1). This is needed for inter-agent communications.
Installing the agents from the SmartStart CD
1. Insert the SmartStart CD into the CD-ROM drive. The SmartStart autorun menu appears.
NOTE: If this is your first time installing this version of the SmartStart CD, you must first accept the license
agreement. Click Agree to accept the terms and conditions.
2. When the Smart Start CD wizard screen appears, click on Software Tab.
3. Select the Install Proliant Support Pack option.
4. Click either Express installation of the PSP for Windows or Custom installation of the PSP for Windows.
5. After HP Smart Update Manager appears, set the location of the updates, and then click Start Inventory.
6. Select Local Host, and then click Next.
7. Select the server OS (Windows Server
®
2003, Windows Server
®
2008, x86, or x64), and then click OK.
8. Click Install.
Configuring the SNMP Agents
To configure the SNMP Agents, click the HP Management Agents icon from the Windows
®
Control Panel.
IMPORTANT: You must have administrator rights to access the Insight Management Agents for Servers for
Windows
®
Control Panel.
NOTE: The server might not have all of the tabs described.
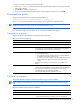
Services tab screen
The Services tab enables you to activate or deactivate Management Agents. Agents can be added or removed by
highlighting the agent and clicking the appropriate button.