
HP Version Control 7.0 Installation and Configuration Guide
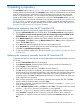

c. In the Port field, enter the proxy server port. For example, enter 8080. If the Server Name
field is blank, this value is ignored.
d. In the Server Login field, enter a valid login for the proxy server. Leave this field blank if
a server login is not required.
e. In the Password field, enter a valid password for the login on the proxy server. If the
Server Login field is blank, this field is ignored.
f. Click OK to save your settings or Cancel to discard the settings.
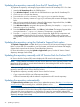
6. Click Finish to save the HP VCRM settings.
If Automatic Update is enabled and a proxy server is configured, the connection with the
proxy server is verified before continuing. If the proxy server cannot be reached, a message
appears indicating there was an error testing the download of the autoupdate catalog. Click
Yes to save your settings or click No to re-enter the proxy server information.
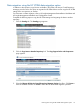
7. The HP Setup wizard page appears, and the installation begins. When it completes, the result
of the installation appears.
8. Click Close. The installation is complete.
Note: You can install the HP VCRM during the HP SIM installation. Refer to the HP SIM User
Guide for more details. Also remember, that in a network, HP VCRM must be installed on only
one system, but the HP VCA must be installed on all servers.
Installing the HP VCRM for Windows silently
The HP VCRM installation for Windows enables you to silently install the HP VCRM.
Installing silently using the CLI
To install silently using the CLI:
From a command prompt, enter the following command:
component name /silent
or
component name /s
For example, you might enter c:\HP VCRM.exe /silent.
NOTE: Installing the HP VCRM using /silent uses %SystemDrive%\repository as the
repository store directory, so you must configure the HP VCRM Automatic Update Settings manually.
34 Installing the HP VCRM on Windows