
HP Insight Control server provisioning Manual Media Server Configuration
5
Manually Creating a Windows-based Media Server
From the IC server provisioning virtual appliance, the IC server provisioning Media Server Setup Utility is
available for download onto a Windows-based server. This utility can be used to setup the Media Server via an
interactive interface. However, this section provides information on setting up a Windows-based Media server
without the utility.
IC server provisioning requires two types of access to the Media Server.
• Windows file share access to read operating system distribution files and HP SPP, and to store the Windows
images created using the provided Windows OS Build Plans (OSBPs).
• HTTP access to read operating system distribution files for Linux and ESXi scripted installations.
This section presumes that the reader is familiar with using a Windows operating system.
Create Windows-based Media Server
To create a Windows-based Media server:
1. On a server already running Windows, create a top level directory under which the Media Server files will be
stored. The example used will be c:\MediaServer.
2. Under this top level directory, create two subdirectories: Images and Media. For example,
c:\MediaServer\Images and c:\MediaServer\Media. The Media folder is where all of the vendor
supplied media will be stored, and the Images folder is where all captured images will be written.
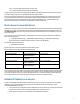
3. For each operating system distribution, create a subdirectory under Media and copy the appropriate
operating system distributions, including hidden or system files, and SPP using the directory names in Table 2.
Using these directory names will ensure the IC server provisioning-provided OS Build Plans will run without
modification.
Setup Windows File Share for Windows Deployments
To setup the Windows file share:
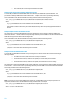
1. Right-click the top level Media Server directory created in Step 1, for example c:\MediaServer, and select
Properties > Sharing Tab > Share button.
2. Enter the user authorized to access this share,
IMPORTANT: Only local Windows user accounts should be given authorization to access the file share.
Authorizing Domain user accounts to access the file share is not supported.
3. Set the Permission Level to Read/Write and click Share.
NOTE: If the user is not given write access then all Image capture build plans will fail while trying to store the
captured image to this share.
4. Apply the following Microsoft patch to enable use of ntlmv2 authentication for access validation on the file
share. The hotfix can be found at: http://support.microsoft.com/kb/957441. The hotfix creates/updates the
following registry entry:
HKEY_LOCAL_MACHINE\SYSTEM\CurrentControlSet\Control\Lsa\MSV1_0\AllowLegacyS
rvCall with value 1 (DWORD).
5. To test that the share was created successfully, access the file share from another Windows server.
Setup HTTP Access for Linux and ESXi Deployments
To setup sharing operating system files via HTTP, it is recommended to use Microsoft Internet Information Services (IIS)
since it is available as an installable feature on Windows servers. It is recommended using IIS 7 or above.