
HP Insight Control Server Provisioning 7.3 Update 1 Installation Guide
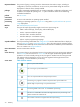
Table Of Contents
- HP Insight Control Server Provisioning 7.3 Update 1 Installation Guide
- Contents
- 1 Introduction/overview
- 2 Requirements and networking considerations
- 3 Installing your Insight Control server provisioning appliance for the first time
- Overview of the first time set up steps
- Get the software for a first time install
- Install Insight Control server provisioning on VMware vSphere/ESXi hypervisor
- Install Insight Control server provisioning on Microsoft Hyper-V hypervisor
- Log in to the appliance and configure appliance networking
- Accessing your appliance from a browser for the first time
- Next steps
- 4 Updating from version 7.2.2 to 7.3.1
- 5 DHCP server setup
- 6 Setting up the Media Server
- Introduction to the Media Server
- Introduction to the Insight Control server provisioning Media Server setup utility
- Requirements for setting up your Media Server
- Procedure for using the Insight Control server provisioning Media Server setup utility
- Changes made to your web server by Insight Control server provisioning Media Server setup utility
- 7 Generating and uploading WinPE to the appliance
- 8 Recommended actions after initial setup
- 9 Support and other resources
- 10 Documentation feedback
- A Updating from version 7.2 or 7.2.1 to 7.2.2
- Best practices for a successful update to 7.2.2
- Get the 7.2.2 update software and prepare it for use
- Prerequisites for update from 7.2/7.2.1 to 7.2.2
- Instructions for updating from 7.2 or 7.2.1 to 7.2.2
- What you need to do after installing the 7.2.2 update
- Changing from single NIC to multi-NIC (optional)
- Instructions for recovering from a failed 7.2.2 update
- REST API call to upload the 7.2.2 update file
- Glossary
- Index

• Read about the build plan changes and consider updating your custom build plans (see the
Insight Control server provisioning All About OS Build Plans and Steps white paper available
at http://www.hp.com/go/insightcontrol/docs).
• Build Plans for HP Insight Control server provisioning version 7.2.2 or newer will use the
following format for Windows, RHEL, and SLES: “ProLiant Drivers for <OS><SPP version>”.
This convention permits maintenance of multiple driver packages on the same appliance. After
an update, all HP-provided OS Build Plans will always use the latest version of the driver
package and customized Build Plans will continue to point to older versions of the driver
package. Decide if you want to update your custom build plans to use the latest driver
packages. If a customized Build Plan needs to be updated to point to the latest version of a
driver package, see the online help topic “Change the version of drivers used in a build plan”
for instructions. The driver packages shipped from 7.2/7.2.1 did not conform to this new
naming convention and these driver packages were based on SPP 2013.02.
• With version 7.2.2 the appliance supports running with two network interfaces. One connects
to your appliance network and the other to a deployment network (see “Appliance networking
considerations” (page 10) for a full description of the multi-NIC network configuration). After
you complete the update to version 7.2.2, if you want to run your appliance in this new
multi-NIC mode, you will need to add a new network adapter to your appliance and then
configure it. Instructions for switching to multi-NIC mode are in the online help topic “Change
from single NIC to Multi-NIC”.
Changing from single NIC to multi-NIC (optional)
With version 7.2.2, the appliance provides the option of using two network interfaces. One connects
to your appliance network and the other to a deployment network (see “Appliance networking
considerations” (page 10) for a full description of the multi-NIC network configuration). After you
complete the update to version 7.2.2, if you want to run your appliance in this new multi-NIC
mode, use the following directions.
Your original appliance has only one NIC, so before you can switch to multi-NIC mode, you need
to add a second network adapter as follows:
1. Shut down the appliance.
2. Use your VM host tools to add a second network adapter to the appliance, making sure it is
the same NIC type as the first NIC. For a VMware system, this should be E1000.
3. Once the second NIC is added, power on the appliance, wait for it to boot and login.
Once the second NIC has been added, use the following procedure to configure it:
1. Select Settings from the main menu and in the Settings Overview screen select the Edit icon
in the Appliance panel.
2. In the Edit Appliance screen, select 2 Deployment. The radio button for the deployment interface
allows you to switch between Shared with appliance (for single NIC setup) and Independent
(for multi-NIC setup) mode. Select Independent to switch to multi-NIC mode.
IMPORTANT: You cannot change the Deployment IP address, so if you switch between
Shared with appliance (single NIC) and Independent (multi-NIC), the Appliance IP will need
to be changed since shared IPs need to be on the same subnet but independent IPs need to
be in separate subnets. HP does not support changing the Deployment IP, even when changing
network interface modes like this.
3. In the Edit Appliance screen select 1 Appliance and change the Appliance IP address and
settings as needed.
4. Once you make the changes, click OK.
5. The system will apply the new network settings and then SHUT DOWN (not reboot) the
appliance.
Changing from single NIC to multi-NIC (optional) 65