
HP Insight Control Server Provisioning 7.3 Update 1 Installation Guide
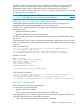
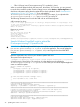
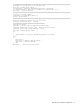
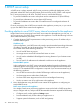

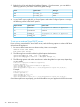
Table Of Contents
- HP Insight Control Server Provisioning 7.3 Update 1 Installation Guide
- Contents
- 1 Introduction/overview
- 2 Requirements and networking considerations
- 3 Installing your Insight Control server provisioning appliance for the first time
- Overview of the first time set up steps
- Get the software for a first time install
- Install Insight Control server provisioning on VMware vSphere/ESXi hypervisor
- Install Insight Control server provisioning on Microsoft Hyper-V hypervisor
- Log in to the appliance and configure appliance networking
- Accessing your appliance from a browser for the first time
- Next steps
- 4 Updating from version 7.2.2 to 7.3.1
- 5 DHCP server setup
- 6 Setting up the Media Server
- Introduction to the Media Server
- Introduction to the Insight Control server provisioning Media Server setup utility
- Requirements for setting up your Media Server
- Procedure for using the Insight Control server provisioning Media Server setup utility
- Changes made to your web server by Insight Control server provisioning Media Server setup utility
- 7 Generating and uploading WinPE to the appliance
- 8 Recommended actions after initial setup
- 9 Support and other resources
- 10 Documentation feedback
- A Updating from version 7.2 or 7.2.1 to 7.2.2
- Best practices for a successful update to 7.2.2
- Get the 7.2.2 update software and prepare it for use
- Prerequisites for update from 7.2/7.2.1 to 7.2.2
- Instructions for updating from 7.2 or 7.2.1 to 7.2.2
- What you need to do after installing the 7.2.2 update
- Changing from single NIC to multi-NIC (optional)
- Instructions for recovering from a failed 7.2.2 update
- REST API call to upload the 7.2.2 update file
- Glossary
- Index

• -F file="@/home/user/IC-server-provisioning-7.3.1–update.bin" (Linux)
When a successful Response Body has been seen, after about 10-15 minutes, you can proceed
to use the UI to install the update. From the Settings screen, select Actions→Update Appliance. You
should see information stating that the update file has been uploaded. See the “Instructions for
updating from 7.2.2 to 7.3.1” (page 31). If you uploaded the
IC-server-provisioning-7.2.2-patch.bin file, go to step 6; if you uploaded the
IC-server-provisioning-7.3.1–update.bin file, go to step 10.
The following illustrates how to Invoke the cURL with its associated response.
cURL command on Linux:
# curl -i -k -H "accept: application/json" -H "content-type: multipart/form-data" -H "accept-language: en-us"
-H "auth: <user-authorization-token>"
-F file="@<path to the update file>" -X POST https://<appliance-hostname-or-address>/rest/appliance/firmware/image
HTTP/1.1 100 Continue
Response on success:
HTTP/1.1 200 OK
Date: Thu, 23 May 2013 18:18:07 GMT
Content-Type: application/json
Via: 1.1 cic.dns.hp
cache-control: no-cache
Transfer-Encoding: chunked
{"fileName":"IC-server-provisioning-7.3.1-update.bin","version":"7.3.1-58602","rebootRequired":false,"estimatedUpgradeTime":15}
Sample Windows PowerShell script to upload the
IC-server-provisioning-7.2.2-patch.bin file
IMPORTANT: The following PowerShell script can only be used to upload the first update file
(IC-server-provisioning-7.2.2-patch.bin) to the appliance. The second update file
(IC-server-provisioning-7.3.1–update.bin) is too large for the PowerShell REST
interface.
Paste the script below into a file on your Windows system and run it.
The syntax for the upload script is:
.\uploadUpdate -ip <appliance ip> -username <username> -password <password> -filename <path to 7.2.2 patch file>
A sample script is shown below. The script logs in to the appliance and uploads the
IC-server-provisioning-7.2.2-patch.bin file. Then you can use the Update Appliance
screen to install the update.
## Parse command line arguments
param (
[string]$ip = $(throw "-ip is required"),
[string]$username = $(throw "-username is required"),
[string]$password = $(throw "-password is required"),
[string]$filename = $(throw "-filename is required")
)
if (-NOT (Test-Path $filename -PathType 'leaf'))
{
throw "$filename is not a valid file"
}
#########################################################################################
# set up script variables/values
$loginurl = "https://$ip/rest/login-sessions"
$loginbody = "{`"userName`":`"$username`",`"password`":`"$password`"}"
#########################################################################################
# accept all certificates as part of handshake - used so that self-signed certs
# from IC server provisioning are accepted
[System.Net.ServicePointManager]::ServerCertificateValidationCallback = {$true}
$webclient = New-Object System.Net.WebClient
#########################################################################################
# set up the request headers
$webclient.Headers.add('content-type', 'application/json')
$webclient.Headers.add('accept', 'application/json')
36 Updating from version 7.2.2 to 7.3.1