
HP Insight Control Server Provisioning 7.3 Update 1 Build Plans Reference Guide


31
@__OPSW-Media-WinUser@@__OPSW-Media-WinPassword@@__OPSW-Media-WinPath@#z
28
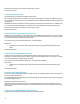
Install Windows SPP In Background
Python
--spp_version=@SPPversion:latest@
29
Wait for HP SA Agent
OGFS
--production --atLeast=2 --atMost=60
30
Report Windows SPP Installation Results
Python
31
Reboot
OGFS
32
Wait for HP SA Agent
OGFS
--production --atLeast=3 --atMost=30
How these build plans were combined
This COMBO build plan gives an example of how multiple individual build plans that are frequently used together can be
combined into one large build plan. The steps themselves will not be discussed in this section as they have been
discussed in previous sections. Instead, this section will go into detail about what was done to combine these build
plans and what modifications were made to the build plan once they were combined. Use the information in this section
as a guide when creating other combined build plans.
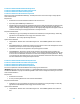
What this build plan does
This build plan is an example of combining a set of actions that frequently go together; enabling the boot from SAN
functionality, installing the operating system, and installing the SPP. It is a combination of three of the build plans that
are provided with the appliance:
ProLiant HW - System ROM Enable Boot from SAN on Bladeserver
ProLiant OS - Windows 2012 R2 Standard x64 Scripted Install
ProLiant SW - Install Windows SPP
It would have been acceptable to take these three build plans and simply concatenate the steps and parameters in order
to make this combined build plan, but several modifications were made to make the build plan more efficient and more
reliable. It is these modifications that are described in the rest of this section.
For clarity, the descriptions below refer to three sections of the build plan. These sections correspond to the groupings
of steps that make up each of the three concatenated build plans.
Step 1 – Move error checking to head of build plan
The Validate Custom Attributes, Check iLO Service, and Verify Supported Boot Modes build plan script steps were moved
from the beginning of the OS installation section to the beginning of the combined build plan. Remember, this step is
used for early error detection. It is better to do all the error checking at the head of the build plan, so if the custom
attribute is not defined, the build plan will fail with this error before the system ROM is modified.
Step 5 – Decommission Server after the first Boot step
The Decommission Server build plan script step was moved from the OS installation section to after the first Boot build
plan script step of the combined build plan. As described above, the Decommission Server step is used when
reprovisioning a server that already has an OS installed on it. When using this step, it must always be used after the first
Boot step of the build plan or the target server may not be able to boot into the service OS to perform the OS
installation.
NOTE: Moving this step is mandatory if you plan on reprovisioning a server with this build plan.
Step 11 – Modified Boot step service OS
All hardware configuration build plans run in the Linux service OS, so in the original Boot from SAN hardware
configuration build plan, the step that reboots the server to apply the settings boots the server back into the Linux
service OS. In this build plan, however, we are about to install Windows, so this boot step was modified to reboot the
server into the WinPE service OS. Had this step not been modified, an additional Boot step would have been needed later