
HP Insight Control Server Provisioning 7.3 Update 1 Build Plans Reference Guide

18
18
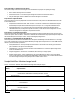
Unmap Network Drive
Python
--driveLetter=Z
19
Set Media Source
Python
@__OPSW-Media-WinUser@@__OPSW-Media-WinPassword@@__OPSW-Media-WinPath@#z
20
ImageX Configuration - Exclusion List
Deploy configuration File
x:\wimscript.ini
21
Windows Image Capture
Python
--wimFilePath="Z:\Images\@WimFileName@"
--systemDiskNumber=@SystemDiskNumber:0@
Important: On a new appliance, the ImageX zip package used in build plan steps 6 and 14 contains a dummy file and
does not contain the imagex.exe utility. imagex.exe is one of the things that are uploaded to the appliance when you
build and upload WinPE as described in the installation guide.
Steps 1 and 3 – Early error detection
These first three steps help catch errors that might affect the running of the build plan later on. Refer to Table 1 –
ProLiant OS – Windows 2012 Standard x64 Scripted Install build plan sample and the detailed descriptions in the Steps 1
to 3 – Early error detection section for that table.
Steps 4 to 6 – Test for an existing image
These steps provide more early error detection. They ensure that a previously captured WIM image file is not
accidentally overwritten. If you want this capture build plan to be able to overwrite a previous image, all three of these
steps can be removed from the build plan.
Unmap Network Drive – This step unmaps the network drive to ensure that a drive used by a previous build
plan is available for use by the current build plan.
Set Media Source – This step mounts the file share from the Media Server so that the following, Prevent WIM
File Overwrite step can check if there is already an image on the Media Server with the same file name specified
in the @WimFileName@ custom attribute.
Prevent WIM File Overwrite – This step ensures that a WIM file that was previously captured is not accidentally
overwritten. The @WimFileName@ custom attribute used by the build plan contains the name of the file
where the captured image will be saved. If the intent is truly to replace a previously captured image using the
same file name, remove the file for the old image from the Media Server.
Steps 7 and 8 – Test for valid ImageX package
These steps ensure that the ImageX package contains the imagex.exe utility and not the dummy file as mentioned
above in the note. Like the early error detection build plan steps, these steps are for early detection that the imagex.exe
utility was uploaded properly to the appliance and fails the build plan before it is rebooted into the service OS where the
imagex.exe utility will actually be run.
ImageX – This is a zip package containing the imagex.exe utility that is needed to capture the Windows OS.
Validate ImageX Package Contents – Verifies that the ImageX package from the previous step contained the
required imagex.exe utility and not the dummy file.
Steps 9 and 10 – Prepare production OS for capture
These steps ensure that the production OS is left in a state where it can be captured and will not cause any conflicts
when it is deployed to a different target server.
Uninstall HP ProLiant Utilities – Some HP Proliant Utilities store server-specific information and, therefore,
must not be included in the captured image. These agents or utilities will not operate properly when deployed
to a different target server. This step removes these agents before the system is captured.
Prepare Windows for Image Capture – This step removes unique information from the Windows OS using
sysprep so that the image can be safely used on a different target server, and configures the Windows
installation to boot to Out-of-box Experience (OOBE) the next time that the server boots.