
HSG80 ACS Solution Software Version 8.7 for Compaq OpenVMS Installation and Configuration Guide

Installing and Configuring HSG Agent
4–6 HSG80 ACS Solution Software Version 8.7 for Compaq OpenVMS Installation and
Configuration Guide
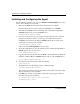
Installing and Configuring the Agent
For the following examples, you can replace DKB600 and DKB100:[SWCC] with “device
names” more suitable for your system.
1. Insert the CD-ROM into the system that is connected to the controller.
For the examples in this section, assume the CD-ROM device is DKB600.
2. To mount the CD-ROM, enter the following at the command prompt (Replace
DKB600 with the name of your CD-ROM device.):
$ MOUNT/OVER=ID/MEDIA=CD DKB600:
3. To create a local directory on your system, enter the following at the command
prompt. Later in this procedure, you will copy the installation file from the
CD-ROM to this new directory. Replace DKB100 with the device-name on the
system that is connected to the controller.
$ CREATE/DIRECTORY DKB100:[SWCC]
A directory named DKB100:[SWCC] has been created.
4. To set the default directory, enter the following at the command prompt (Replace
DKB100 with the name of your device):
$ SET DEFAULT DKB100:[SWCC]
5. Copy the self-extracting file from the CD-ROM to the default directory. Enter the
following command (Replace DKB600 with the name of your CD-ROM drive):
$ COPY DKB600:[AGENT]swcc25.exe *.*
6. To expand the self-extracting file, enter the following:
$ RUN swcc25.exe
7. To install the kit, enter the following at the command prompt:
$ PRODUCT INSTALL SWCC/SOURCE=[ ]
The system responds with a message that SWCC is the product selected to install.
You are asked if you want to continue.
8. Press Enter to continue. An installation verification message appears. The last
line of the message is the following:
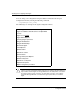
To configure SWCC Agent for HS* controllers:
@sys$manager:swcc_config